
Working with PowerPoint 2008 (Mac)
A University of Michigan Library Instructional Technology Workshop
Need help? Visit the Faculty Exploratory or Knowledge Navigation Center on the 2nd floor of the Graduate Library.
exploratory@umich.edu
| http://guides.lib.umich.edu |
rev: 6/29/09
1 of 17
Table of Contents
Bare Basics..................................................................................................................... 2
Inserting a New Slide/ Changing the Layout............................................................................................ 2
Adding Content ............................................................................................................................................. 2
Adding a Design/Changing the Background ............................................................................................ 3
Changing the Order of Your Slides ............................................................................................................ 3
Adding Transitions ........................................................................................................................................ 4
Adding Animations ....................................................................................................................................... 4
Viewing the Presentation ............................................................................................................................. 4
Changing the Formatting of All Slides with the Slide Master .................................... 5
Master Slide Example 1: Changing the Title Formatting ....................................................................... 5
Master Slide Example 2: Changing Bullets ................................................................................................ 6
Master Slide Example 3: Changing the Shape of the Title Text Box .................................................... 6
Inserting and Manipulating Objects ........................................................................... 7
Adjusting Your Images, Shapes, and Text Boxes ..................................................................................... 7
Inserting Charts ............................................................................................................................................. 9
Working with SmartArt .............................................................................................................................. 10
Hyperlinks .................................................................................................................... 11
Creating Hyperlinks .................................................................................................................................... 11
Linking to Other Slides or Files ................................................................................................................ 11
Working with Audio and Video .................................................................................. 12
File Types ..................................................................................................................................................... 12
Inserting Sound or Video ........................................................................................................................... 12
Animation Effects ........................................................................................................ 13
Hidden Slides ............................................................................................................... 14
Inserting Slide Numbers, Date, and Footers ............................................................. 14
Printing and Saving as a PDF ...................................................................................... 15
Design Tips ................................................................................................................... 16

Working with PowerPoint 2008 (Mac)
A University of Michigan Library Instructional Technology Workshop
Need help? Visit the Faculty Exploratory or Knowledge Navigation Center on the 2nd floor of the Graduate Library.
exploratory@umich.edu
| http://guides.lib.umich.edu |
rev: 6/29/09
2 of 17
Bare Basics
PowerPoint is an excellent tool for presentations of any kind, either in the classroom or at a
conference. A PowerPoint presentation is made up of a series of “slides” that can be projected
(displayed electronically) or printed in a variety of handout formats. When you open PowerPoint,
a new presentation is created with a Title Slide in place. This section covers the bare basics that
you need to know, and refers you to other sections in the document for more details if desired.
We do not recommend PowerPoint for creating conference posters; we suggest you use
Illustrator instead. The two main new features in Office 2008 are the Elements Gallery (located
below the standard toolbars) and the Formatting Palette (View menu, then Formatting
Palette).
INSERTING A NEW SLIDE/ CHANGING THE LAYOUT
To add a new slide, click on the New Slide icon in the Standard Toolbar. A new slide with the
same layout as the selected slide will be added (except after the initial Title Slide, when a Title and
Content slide is added).
To change the layout of the current slide or the
one you are adding, click on the Slide Layouts
tab in the Element Gallery.
Notice you can choose to Apply to slide or
Insert new slide. Choose whichever is
appropriate – to the right end of the row, you will see an option to page forward or backward to
see more layouts.
The slide layouts look a little different in PowerPoint 2008, as shown above. When you choose
Title and Content, for example, you can either add text or content (such as a picture or chart). If you
start with bulleted text, for example, you would need to go to the Insert menu (or click on the
icon in the Standard Toolbar) to add an image; the icon on the slide itself disappears.
ADDING CONTENT
To add text, click in any box that says
Click to add text
and start
typing. If there is a bullet, push Return on the keyboard to get a
new bullet; to get a subpoint, push Tab on that blank line and the
text will indent further and become smaller. To get back to the
main level bullet, push the Shift and Tab keys on a blank line.
To change the bullets, font, etc. on all slides, use the Slide Master
(see page 5).
To add graphics, charts, etc., click on the appropriate icon (before
you type text in the box) and choose the file you would like on the
slide. Notice that it will resize to fit into the box.
Also note that when you add one type of content, the other options
disappear. You can always go to the Insert menu or click on the icon in the Standard Toolbar to
add more images, text boxes, etc. (see page 7).

Working with PowerPoint 2008 (Mac)
A University of Michigan Library Instructional Technology Workshop
Need help? Visit the Faculty Exploratory or Knowledge Navigation Center on the 2nd floor of the Graduate Library.
exploratory@umich.edu
| http://guides.lib.umich.edu |
rev: 6/29/09
3 of 17
ADDING A DESIGN/CHANGING THE BACKGROUND
Design templates are the fancy backgrounds you may have seen on other presentations. Generally,
you want to use the same design for all of the slides in your presentation. In the Element Gallery
(right below the main toolbars), click on the Slide Themes tab and then click on the design image
to apply it. Click on the Next Page arrow ( ) to see other options.
Once you’ve chosen a general look from the Slide
Themes, you can customize it further by using built-in
color or font schemes (the Colors and Fonts icons in
the Formatting Palette).
To change the background color of the slide, you can go
to the Format menu and choose Slide Background….
You could also choose a color from the Slide
Background section of the Formatting Palette, or click
on the Format Background button in that section to get to
the Slide Background dialog box.
In the Slide Background dialog box, you can choose to
have a solid or gradient as your background as well as a picture or texture. Note that
if you close the dialog box, the changes will happen only on the selected slides. To
change all slides (including ones not yet created), click on the Apply to All button.
To hide the default graphic, check the box that says Hide Background Graphics in the
Slide Background section of the Formatting Palette.
CHANGING THE ORDER OF YOUR SLIDES
If the slides you want to move around are next to each other, you can “drag and drop” them
in the Normal View. Click on the small image of the slide in the left column, and drag it
where you want it to be. When you see the horizontal line, let go, and the slides will change
places.
If you have a lot of slides, it might be easier in the Slide Sorter View. Go to
the View menu, and click on Slide Sorter (or click on the middle icon at
the left end of the Status Bar ). This view allows you to view
multiple slides at once; click, hold, and drag the slide until you see a gray
line appear where you want the slide positioned, and then let go.
To move multiple slides at the same time, hold down the Shift key as you click
to select consecutive slides (Command/Apple if they are not consecutive), then
drag them to the new location. You can also select slides to copy into a
different presentation this way.
Double-click on a slide or click the Normal icon to return to the Normal View.

Working with PowerPoint 2008 (Mac)
A University of Michigan Library Instructional Technology Workshop
Need help? Visit the Faculty Exploratory or Knowledge Navigation Center on the 2nd floor of the Graduate Library.
exploratory@umich.edu
| http://guides.lib.umich.edu |
rev: 6/29/09
4 of 17
ADDING TRANSITIONS
Transitions happen
between
one slide and the next. To add a transition, go to the Elements
Gallery, click on the Transitions tab and choose one of the icons. Click on the Next Page arrow
( ) to see other options. The transition will be applied to the selected slide.
To change the speed or to apply the same transition to all the slides, click on the
Options… button.
If you choose, you can change the Advance Slide checkbox to Automatically After:
and put in the number of seconds.
ADDING ANIMATIONS
Animation effects happen
within
an individual slide (for example, bulleted text appearing one at a
time, or objects appearing). We go into more details on page 13, but here are the basics:
1. On the slide, select the object/text that you want to animate.
2. Go to the Slide Show menu and choose Custom Animation… or click on the
Custom Animation icon in the Formatting Palette.
3. In the Custom Animation Pane, click Add Effect, then Entrance, and then select
an effect (click on More Effects… to see more choices).
4. Use the arrows at the bottom of the pane to change the order of the animations.
You have the option to add an entrance, emphasis, or exit animation to an object. All
work in the same fashion. Again, more details on page 13.
VIEWING THE PRESENTATION
At any time you can view your presentation from the beginning by going to Slide Show
menu and choosing View Slide Show. If you click on the Slide Show icon ( ) in the lower left
corner, you will start from the selected slide.
While you are in the Slide Show View, advance your
presentation by pressing the Spacebar on the keyboard. To
go back a slide, use either the left or up arrow key on your
keyboard.
During your presentation, you can navigate to any slide in
the presentation:
1. Right-click (or Control-click) anywhere on the slide.
2. Choose Go to Slide from the shortcut menu.
3. Click on the appropriate slide. If the slide doesn’t
have a title, it will say
Slide #
(see Slide 4 at right).
To exit your presentation (and return to the editing view), press the esc key on the keyboard.
Working with PowerPoint 2008 (Mac)
A University of Michigan Library Instructional Technology Workshop
Need help? Visit the Faculty Exploratory or Knowledge Navigation Center on the 2nd floor of the Graduate Library.
exploratory@umich.edu
| http://guides.lib.umich.edu |
rev: 6/29/09
5 of 17
Changing the Formatting of All Slides with the Slide Master
To make changes to the format of all your slides at once, using the Slide Master is probably the
best idea. The Master is what controls how your slides will look: what fonts, colors, bullets, etc.
will be used on each slide. Within the Master View, any of the formatting for your presentation
can be changed at once, and then applied to all slides immediately; for example, you can change
the font of the title, text or the type of bullets used, add an image to the background, add an
image to every slide, etc. Once you close the Master, this format will be in effect on all slides –
including the ones you later add.
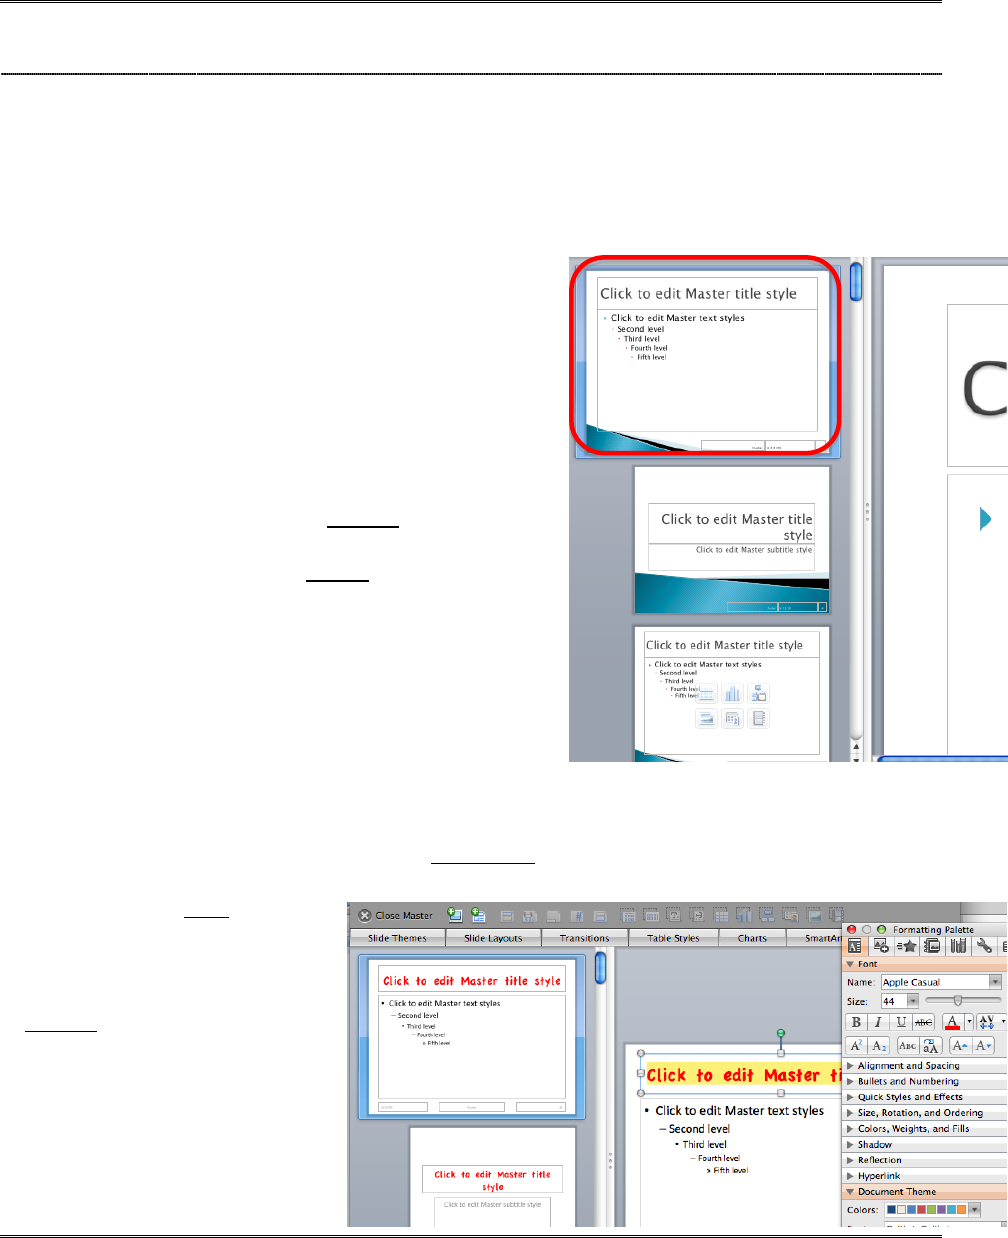
To access the Master Slide, go to the View menu, then
Master, and then choose Slide Master.
By default, you will be on the main Master Slide, so any
changes you make will affect all of the slides, regardless
of layout. If you want to change something on a
particular layout (for example, to center the titles on all
of the comparison slides) choose that Sub-Master.
When you are finished go to the View menu, and
choose Normal, or click on the Normal icon in the
lower left corner of the PowerPoint window or click on
the Close Master button on the Master Toolbar.
For all the examples below, make sure you are on the
Main Slide Master (the one at the very top in the left
column).
MASTER SLIDE EXAMPLE 1:
CHANGING THE TITLE FORMATTING
1. Highlight the Click to edit Master title style text.
2. Choose the font, size, etc. from the Formatting Toolbar, or go to the Format menu and
choose Font… or click on the Formatting Palette and choose a font, size, and color
from the Font section.
When you are finished, go to
the View menu, and choose
Normal, or click on the
Normal icon in the lower left
corner of the PowerPoint
window.

Working with PowerPoint 2008 (Mac)
A University of Michigan Library Instructional Technology Workshop
Need help? Visit the Faculty Exploratory or Knowledge Navigation Center on the 2nd floor of the Graduate Library.
exploratory@umich.edu
| http://guides.lib.umich.edu |
rev: 6/29/09
6 of 17
MASTER SLIDE EXAMPLE 2: CHANGING BULLETS
1. Make sure you are on the Main Slide Master (the one at the very top in the left column).
2. Put your cursor anywhere in the Click to edit Master text style text.
3. Go to the Format menu and choose
Bullets and Numbering….
4. If you want, choose a different color
from the Color: pulldown, and/or
change the Size:.
5. To change the bullet, click on the
double arrows at the right of the Custom
bullet: box and choose Character… (or
Picture…, if you have a small picture
you want to use as a bullet).
6. In the View: pulldown, choose All
Characters, then in the Symbols (or
whatever category you’d like), choose
the desired character and click the Insert
button.
7. Click OK to exit the dialog box and return
to the Master Slide.
When you are finished, go to the View menu and choose Normal, or click on the Normal icon in
the lower left corner of the PowerPoint window.
MASTER SLIDE EXAMPLE 3: CHANGING THE SHAPE OF THE TITLE TEXT BOX
1. Make sure you are on the Main Slide Master (the
one at the very top in the left column) and then
click on the edge of the Title text box.
2. Make sure the Drawing Toolbar is showing (View
menu, then Toolbars, and then Drawing).
3. Click on the Draw button (first one at the top of
the toolbar), then choose Change Shape, and pick
the style you would like. Until you add color to
the inside (fill) or outline, you won’t see the shape.
4. Add color to the text box by clicking on the arrow
next to the Fill Color ( ) icon.
5. Add color to the line around the box by clicking
on the arrow next to the Line ( ) icon.
When you are finished, go to the View menu and choose
Normal, or click on the Normal icon in the lower left corner of the PowerPoint window.

Working with PowerPoint 2008 (Mac)
A University of Michigan Library Instructional Technology Workshop
Need help? Visit the Faculty Exploratory or Knowledge Navigation Center on the 2nd floor of the Graduate Library.
exploratory@umich.edu
| http://guides.lib.umich.edu |
rev: 6/29/09
7 of 17
INSERTING AND MANIPULATING OBJECTS
Photographs, ClipArt, shapes, charts, and other graphics can enhance
PowerPoint presentations. If you reduce the size of your picture in PowerPoint,
it usually looks fine, but some pictures will become “pixely” when you increase
their size. You can insert images, ClipArt, shapes, and so on by clicking on the
appropriate icon on one of the various slide layouts or the Standard Toolbar, or
by going to the Insert menu.
Once you insert an object, a contextual Picture section will appear in the
Formatting Palette (see next page for a picture).
To create shapes, choose the shape from the Shapes icon – if
you click and release on your slide, you will get a standard sized
shape that then you can resize; if you click, hold, and drag on the
slide, you will draw out the shape. It can then be resized, moved,
and colored as described below.
SmartArt is a special form of shape, and is described in more detail below, as is information on
inserting Charts.
ADJUSTING YOUR IMAGES, SHAPES, AND TEXT BOXES
After you have inserted the object, you can change it in many ways. Make sure it is selected (click
on it once) to do the following:
To move it, click on it, hold, and then drag it to the desired location.
To resize it, click and drag one of the little circles that appears in the corners –
dragging from the corner keeps it proportionate (for shapes, hold down the Shift key
to keep it proportionate). Note that depending on the file type, your image may
become distorted if you make it bigger.
To rotate the image/shape, click and drag on the green circles at the top.
To modify the proportions of a shape, click, hold, and drag one of the yellow diamonds that
appears on the shape.
To add text to a shape, right-click (or Control and click if you have a single button
mouse) and choose Edit Text. A cursor appears in the shape - start typing. The text
will automatically fit inside the shape. To edit or modify the text (color, size, font,
etc.), highlight the text and make the change.
To connect lines between objects, choose a line from the Shapes icon,
move your cursor over the object until you see a red square. Click and
hold on the red square, drag to the other object until you see a red square again, and
then let go of the mouse button.

Working with PowerPoint 2008 (Mac)
A University of Michigan Library Instructional Technology Workshop
Need help? Visit the Faculty Exploratory or Knowledge Navigation Center on the 2nd floor of the Graduate Library.
exploratory@umich.edu
| http://guides.lib.umich.edu |
rev: 6/29/09
8 of 17
Everything below is done using the Format Palette shown here.
To crop the image/shape, click the Crop icon in the Picture section.
Cropping handles will appear – move these by clicking and dragging, and the
image will automatically be cropped. Note that unlike a program like
Photoshop, the cropped portion of the image is still in the document unless
you compress the image (as described below). You can get the cropped area
back by clicking the Reset icon.
To make the background of an image transparent, so
it blends into your background, click on the Transparent
Color icon in the Picture section, then click on the area in
the picture that you’d like to be transparent. You only get
one color, so this only works with solid colors. If
you have a more complicated image, you
might want to adjust it in Photoshop or some
other editing program before inserting it into
PowerPoint.
To apply styles and effects, you can play
with the Effects… button in the Picture section, or choose a preset style in the
Quick Styles and Effects section.
To align objects, select one, hold down the Shift key on the keyboard and
select the other(s), then click on the Align pulldown menu in the Size,
Rotation, and Ordering section.
To change the order of the objects, click on the Arrange pulldown menu in
the Size, Rotation, and Ordering section.
To group objects together, select one, hold down the Shift key on the
keyboard and select the other(s), then click on the Grouping pulldown menu in
the Size, Rotation, and Ordering section. When moved, resized, or animated,
grouped objects act as one.
To change the color (inside or out), use the arrow next to the Fill Color
icon (inside) or the Line Color icon (outline) in the Colors, Weights, and Fills
section. You can also change the thickness and type (dashed, etc.) of the line.
You can also add shadows and reflections effects using the
settings in those sections.

Working with PowerPoint 2008 (Mac)
A University of Michigan Library Instructional Technology Workshop
Need help? Visit the Faculty Exploratory or Knowledge Navigation Center on the 2nd floor of the Graduate Library.
exploratory@umich.edu
| http://guides.lib.umich.edu |
rev: 6/29/09
9 of 17
INSERTING CHARTS
To create a chart from scratch, click on the Chart icon ( ) on the slide and choose a type from
the Chart tab of the Elements Gallery (shown below). Excel will launch with some sample data –
edit the data as needed, and then quit Excel and the chart will display on the PowerPoint slide.
If you already have a chart created in Excel (which is what we would recommend), open the file
with the chart and copy the chart. Then in PowerPoint, click on the Chart icon ( ) on the slide
and paste. If you don’t click on the icon first, it won’t automatically fit to the placeholder space
(which may be fine with you). You could also just choose a Blank type slide, or a Title Only and
paste to get a larger version of the chart.
Change the chart type (even one that was copied and pasted in) by
clicking on the chart and choosing a different type from the Chart tab of
the Elements Gallery.
Change the style of the chart in the Chart Style section of the
Formatting Palette.
To change the color, etc. of the data series, double-click on it to open
the Format Data Series dialog box (shown below).
Add a title, move the legend and so on in the Chart Options section.
Edit the data by clicking on the Edit in Excel… button in the Chart Data
section. Excel will launch and you can change your data. When you save
the Excel file and return to PowerPoint, the chart will have changed.
However, if you open the Excel file directly and change it, it will NOT be
reflected on the chart.

Working with PowerPoint 2008 (Mac)
A University of Michigan Library Instructional Technology Workshop
Need help? Visit the Faculty Exploratory or Knowledge Navigation Center on the 2nd floor of the Graduate Library.
exploratory@umich.edu
| http://guides.lib.umich.edu |
rev: 6/29/09
10 of 17
WORKING WITH SMARTART
SmartArt is a new way to insert diagrams in Office 2008. When you click on the SmartArt
Graphic icon ( ) in a layout or choose it from the Insert menu, the Elements Gallery opens to
the SmartArt Graphics tab. Scroll through them using the arrows at the right of the tab, or click
on one of the various categories such as List, Process, Relationship and so on. Choose the one that
best suits your needs – you can always change it later (without having to retype anything!)
Add text to the shapes by clicking in the shape or using the Text Pane (to the left of the
diagram). In the Text Pane, press Enter on the keyboard to begin typing in the next shape; if you
press Enter from the last bullet, a new shape will be added to your diagram.
Change the layout by choosing a new look in the SmartArt Graphics tab.
Change overall style or
colors by using the SmartArt
Graphic Styles section of the
Formatting Palette.
Change the fill, outline or
style of an individual element
by clicking on it (“Bananas”
is selected in this example),
and choosing from the Quick
Styles and Effects section or,
like any shape, in the Colors,
Weights, and Fills section.
Change one of the shapes
to emphasize it by clicking on
the Shape icon in the
SmartArt Graphic Styles
section.

Working with PowerPoint 2008 (Mac)
A University of Michigan Library Instructional Technology Workshop
Need help? Visit the Faculty Exploratory or Knowledge Navigation Center on the 2nd floor of the Graduate Library.
exploratory@umich.edu
| http://guides.lib.umich.edu |
rev: 6/29/09
11 of 17
HYPERLINKS
Hyperlinks in PowerPoint are similar to links you might have seen on a web site. They allow you
to jump back and forth between specific slides in your presentation, to other files, or to a webpage
(if you are connected to the Internet). If you have an Internet connection, this is the easiest way
to show YouTube or other videos that are already online.
Remember
, you will move from the
PowerPoint presentation to the web browser. You’ll then need to click back to your presentation
(or use Apple/Command-Tab on the keyboard).
CREATING HYPERLINKS
1. Select the text or image that will have the
hyperlink.
2. Go to the Insert menu and choose
Hyperlink….
3. Paste the link in the Link to: field.
4. Click the OK button.
Remember, you need to have a live connection to
the Internet for this to work. If you’ve saved the
file locally on your computer, you can navigate to
it with the Locate: button and then click OK.
The hyperlink only works in the Slide Show View.
LINKING TO OTHER SLIDES OR FILES
If you want to link to another slide in your presentation,
1. Highlight the text or image, go to the Slide Show menu
and choose Action Settings….
2. Change the radio button to Hyperlink to: and choose the
appropriate item. Note that you can insert Internet
hyperlinks (using the URL option) via this method as
well as the way described above.
3. Click OK when you are ready.
There is a set of Action Buttons under the Shapes icon if you
want one of the standard icons. When you choose one of these,
the Action Settings dialog box opens automatically. Resize,
recolor and change Action Buttons as you would
any shape, as described on page 7.

Working with PowerPoint 2008 (Mac)
A University of Michigan Library Instructional Technology Workshop
Need help? Visit the Faculty Exploratory or Knowledge Navigation Center on the 2nd floor of the Graduate Library.
exploratory@umich.edu
| http://guides.lib.umich.edu |
rev: 6/29/09
12 of 17
WORKING WITH AUDIO AND VIDEO
While how you insert a movie or sound file is similar to inserting a picture (click on the icon on
the slide, or click on the Media icon in the Standard Toolbar), how PowerPoint deals with these
files is different. Unlike an image file, which is embedded into your presentation, media clips are
linked, so you must retain the media clip and move it if you move
your presentation. For this reason, we recommend that you always
store the media clips in the same location as the presentation that
will use them; that way, if you move the presentation, you can
move the media file and keep it in the same relative location to the
presentation.
Also, be sure that the computer you’re using has speakers. If you are in a large room, make sure
that you can hook your computer to the in-room audio, or no one will be able to hear your video!
FILE TYPES
While it’s true that the media file is linked to the PowerPoint presentation, if you use one of the
formats described below, it will still display on the PowerPoint slide – if you don’t use one of
these formats, you can hyperlink to the file and play it outside of PowerPoint (in QuickTime
Player, for example). Then, after you finish showing the clip, you’ll need to get back into
PowerPoint to continue your presentation. For longer clips, you may want to just play it directly
from the DVD.
Most, but not all audio and video file types, work in PowerPoint 2008, but some are not cross-
platform. Therefore, you need to know what computer you are using (Mac or Windows) as well as
what additional software is available if you are presenting on a computer that is not your own.
Sound formats that work with PowerPoint 2008 include .aiff, .aif, .mov, .aac, .mp3, .mpeg, .midi,
.mid, .kar, and .wma. RealAudio (.ra) files will not work directly in PowerPoint, and will need to
be converted.
Video formats that work with PowerPoint 2008 include, .mov, qvtr, .swf, mpeg2, .mpeg4, and
.avi. Avi files work with both the Mac and Windows platforms.
INSERTING SOUND OR VIDEO
1. To insert a sound or video file, either click the icon on the
slide, or click on the Media icon in the Standard Toolbar.
2. Navigate to the correct clip, and click the Choose (movies)
or Insert (sounds) button.
3. A dialog box will appear asking if you want the sound to
start automatically or when clicked. If you change your
mind later, click once on the
movie/sound, then go to the
Movie section of the
Formatting Palette and
change it.

Working with PowerPoint 2008 (Mac)
A University of Michigan Library Instructional Technology Workshop
Need help? Visit the Faculty Exploratory or Knowledge Navigation Center on the 2nd floor of the Graduate Library.
exploratory@umich.edu
| http://guides.lib.umich.edu |
rev: 6/29/09
13 of 17
Animation Effects
Animation effects happen within an individual slide: making objects appear, bringing in one bullet
point at a time, etc. Effects can be automated, so they begin at a set time after the last effect, or
even immediately, as soon as the slide is shown. Custom Animation allows you to tailor the
effects to your particular needs.
You can choose Entrance (green star), Emphasis (yellow star), or Exit (red star) custom
animations. Under each type, there is a list of a few common effects, but by choosing the
animation type and then selecting More Effects… you will see a list of all animations of that type.
Entrance effects all begin with your object off screen and have the object enter the show with effects
such as sliding, zooming, or bouncing in. Emphasis effects include color
changes and wiggling, without moving the object. Exit effects are similar to
Entrance, causing your object to spin, flip, or zoom off-screen.
In the example below, we’ll add an Entrance Effect, but the other types of
effects are similar.
1. On the slide, select the object/text that you want to animate.
2. Go to the Slide Show menu and choose Custom Animation or
click on the Star icon at the top of the Formatting Palette.
3. In the Custom Animation section of the Formatting Palette, click
the Entrance Effect icon ( ) and then choose an effect. Notice
that if you choose the More Effects… option, as you click on the
various options, you’ll see an automatic preview.
4. The object/text appears in the animation list.
To change the effect, select the item in the list, Control-click (or right-click)
on it and choose Change Effect…. You can delete the effect by clicking on
the below the list and then adding a different one, if you prefer that
method. If you just select it and add another effect you will actually add a
second effect to the item, not change the one that’s already there!
To change the order in which items appear on the slide, use the up and
down arrows at the bottom of the Custom order section.
To change when the item animates, click on the Start: pulldown and
choose With Previous or After Previous. If you choose After Previous, you can
set the delay by clicking on the item and then choosing the Timing… option.
If you have sub-points, and want them to come in individually, in the Text
Animations section, click on the Animate text: pulldown and choose 2nd level
(or whatever is appropriate).
Animate charts in the same way – when you click on the chart, the Chart
Animations section appears in the Formating Palette, and you can control how the
chart elements appear.

Working with PowerPoint 2008 (Mac)
A University of Michigan Library Instructional Technology Workshop
Need help? Visit the Faculty Exploratory or Knowledge Navigation Center on the 2nd floor of the Graduate Library.
exploratory@umich.edu
| http://guides.lib.umich.edu |
rev: 6/29/09
14 of 17
HIDDEN SLIDES
Hidden Slides, as the name suggests, are slides that will not appear in your presentation but are still
part of your presentation. They might be slides that you have put in your presentation but later
choose to hide because you foresee time limitations, or they might be slides containing statistics to
back up a claim in your presentation.
Go to the slide you wish to hide, then go to the Slide Show menu and choose Hide Slide.
Now it will be hidden during your presentation unless you specifically navigate or link to it – if
you are in Normal View (seeing the slide and smaller versions of the slides on the left of the
screen) or Slide Sorter View, you should notice that the hidden slide has a line through the
number and seems a little grayed out. The Slide Sorter View is convenient if you are hiding
multiple slides at a time.
To go to a hidden slide during your
presentation, right-click (or Control-click)
anywhere on the current slide, choose the Go to
Slide option, and then pick your hidden slide.
The hidden slide will have parentheses around
the slide number.
When you show a Hidden Slide and then click or
press the spacebar to advance to the next slide
in the sequence, it will jump to your next “real”
slide, not the next Hidden Slide (even if one
happened to be next).
INSERTING SLIDE NUMBERS, DATE, AND FOOTERS
Go to View menu and choose Header and Footer….
Choose the options you would like, including typing
text in the Footer box, and then click either the Apply
or Apply to All button.
If you want to change the position of the header or
footer, move the placeholder text box on the Master
Slide (see page 5 for more information about the
Master Slide).
Notice that by default, you are editing the header
and footer for the slide that will display during your
presentation. Click on the Notes and Handouts tab to
edit the header on those instead.

Working with PowerPoint 2008 (Mac)
A University of Michigan Library Instructional Technology Workshop
Need help? Visit the Faculty Exploratory or Knowledge Navigation Center on the 2nd floor of the Graduate Library.
exploratory@umich.edu
| http://guides.lib.umich.edu |
rev: 6/29/09
15 of 17
PRINTING AND SAVING AS A PDF
Whether you choose to print your presentation or save it as a PDF to put on the web, the choices
are the same. To save as a PDF, select your settings as described for printing, then click on the
PDF button at the bottom of the dialog box and choose Save as PDF….
Slides: Choose which of the slides you’d like to print/save.
Print What: choose to print one slide per page, or several slides per page (3 per page with lines
for notes is shown here). 3 or 6 per page is often a good option for posting to your CTools site
for your students, because they can zoom in if they want to, and if they print, it’s not as much
paper.
Notes Pages prints a small version
of the slide and any text you’ve
added in the notes area. Access the
notes area beneath the slide in
Normal View, or go to the View
menu and choose Notes Page.
Outline View prints the title text
and text that uses the preset text
boxes.
Output: choose as desired – if you are
printing on a black and white printer, be
sure to choose Grayscale or Black and White.
Check Boxes: choose to frame the slides,
print hidden slides, etc.
Press Print to print or click on the PDF
button at the bottom of the dialog box and
choose Save as PDF….

Working with PowerPoint 2008 (Mac)
A University of Michigan Library Instructional Technology Workshop
Need help? Visit the Faculty Exploratory or Knowledge Navigation Center on the 2nd floor of the Graduate Library.
exploratory@umich.edu
| http://guides.lib.umich.edu |
rev: 6/29/09
16 of 17
DESIGN TIPS
BACKGROUNDS AND COLORS
Consistency in font, background, and color scheme are important.
PowerPoint has templates that come with their color schemes. Use
them or choose your own, but be deliberate in your choices.
Can you see colors in the Wood slide? Is it appropriate?
Notice in the Portfolio slide, if you change the background color,
it only changes the color on the edge, not the main part (which is
an image).
The Note Pad slide has difficulty lining the text on the lines.
The Black slide doesn’t have enough color distinction with the text.
Note that the lighting of your presentation room could change how your slide appears.
BULLETS, FONTS, AND TEXT
Limit text to 5 or 6 words per line, and 5 or 6 bullets per slide.
Use concise wording, and elaborate as you speak.
Try to stick with 22-point fonts or larger.
People often use serif fonts for titles and sans-serif for the bullets.
Use fonts that are easy to read – avoid script fonts or ALL CAPS!
Be consistent in your use of headline or sentence capitalization for the
titles and bullets.
Generally, left-justify bullets; centered looks ragged (don’t use bullets if centering).
Some fonts exist on Mac but not on Windows and vice versa. This can affect your text/bullets.
When at all possible, use the text boxes that come with the layouts. The Master Slide controls
these, not text boxes you add manually.

Working with PowerPoint 2008 (Mac)
A University of Michigan Library Instructional Technology Workshop
Need help? Visit the Faculty Exploratory or Knowledge Navigation Center on the 2nd floor of the Graduate Library.
exploratory@umich.edu
| http://guides.lib.umich.edu |
rev: 6/29/09
17 of 17
GRAPHICS/CHARTS/MULTIMEDIA
If you don’t give it a title, “Slide X” will display in the slideshow navigation.
Add the title, and then move it behind the image. It won’t show on the
screen, but you can use the information to navigate.
Media should have a purpose; don’t put it on if it doesn’t have a place.
Balance text and graphics; pay attention to placement of the image.
There is limited editing capability within PowerPoint; you may need to
adjust your images in Photoshop or some other editor.
To quickly create several slides with images, use the Photo Album.
Use animations to highlight graphics if appropriate.
Make sure your chart is legible and displays the right type of information.
GENERAL POWERPOINT TIPS
You can read what’s on the slide in case people can’t see it, but then be
sure to expand on each point.
Print the Notes Pages to keep track of what you want to say on each slide.
Check your spelling!
Know how to move back and forth between slides without exiting the show – right-click (or
Control-click) on the slide to bring up the navigator, use Apple/Command+Tab to move between the
show and a web browser.
Use hidden slides to have information ready “just in case”.
Know what your last slide is – blank, “Questions?”, contact info, etc. – and when it’s coming!
GENERAL PRESENTATION TIPS
Know your equipment if possible; arrive early and test it.
Bring back ups (jump drive, CD, printout, etc.).
PRACTICE out loud!!
Speak loudly and clearly with enthusiasm, and make eye contact with the audience.
Ask the audience questions to make sure they are with you (if appropriate).
EXAMPLES
http://www.tlccreative.com/port_ppt.htm
http://www.indezine.com/products/powerpoint/cool/index.html
http://www.youtube.com/watch?v=cagxPlVqrtM&feature=related
