
Free File Fillable Forms
User’s Guide
Publication 5274 (12-2016) Catalog Number 69459T Department of the Treasury Internal Revenue Service IRS.gov
2
Search this document easily. Holding down the Ctrl key and pressing the F key (Ctrl+F) will bring up a
search box where you can enter a key word to search.
Table of Contents
Before Getting Started ............................................................................................................................. 4
Create Your Account ................................................................................................................................ 4
Select Your Main Form ............................................................................................................................ 5
Selecting Areas to Enter Information ........................................................................................................ 5
Moving within the Forms ....................................................................................................................... 5
Entering your Information ..................................................................................................................... 5
Types of Information Areas on the Forms ................................................................................................ 6
Manual Entry Fields .............................................................................................................................. 6
Drop-Down Menu (or pick-list) .............................................................................................................. 6
Calculated Fields .................................................................................................................................. 6
Radio Buttons ....................................................................................................................................... 6
Checkboxes ......................................................................................................................................... 7
Additional Information Areas................................................................................................................. 7
Description Area ............................................................................................................................... 7
Amount Area ..................................................................................................................................... 8
Attaching Statements ........................................................................................................................ 8
Tabs, Links, Buttons and Icons ................................................................................................................ 8
1. STEP 1 .......................................................................................................................................... 8
2. ST
EP 2 .......................................................................................................................................... 8
3. Fi
le an Extension ........................................................................................................................... 8
4. He
lp............................................................................................................................................... 8
5. I
RS Publications ............................................................................................................................ 9
6. I
nteractive Tax Law Assistant ........................................................................................................ 9
7. U
pdate Your Account .................................................................................................................... 9
8. Sign Out ........................................................................................................................................ 9
9. Save .............................................................................................................................................. 9
10. Print Return ............................................................................................................................... 9
11. A
dd/View Forms ........................................................................................................................ 9
12. S
tart Over .................................................................................................................................. 9
13. C
heck efile Status ...................................................................................................................... 9
14. F
AQs ......................................................................................................................................... 9
15. I
nstructions for This Form .......................................................................................................... 9
16. D
o the Math ............................................................................................................................... 9
17. D
elete This Form ....................................................................................................................... 9
3
18. Print This Form .......................................................................................................................... 9
19. Done With This Form ................................................................................................................. 9
Add and Delete Forms ............................................................................................................................. 9
Add Forms .......................................................................................................................................... 10
1. Add/View Forms Icon ............................................................................................................... 10
2.
Add Button ............................................................................................................................... 10
Deleting Forms ................................................................................................................................... 10
Delete this Form Button .................................................................................................................. 10
Add/View Form Icon ........................................................................................................................ 10
STEP 2 – Preparing to E-File Now ......................................................................................................... 10
Section 1: Add Income Documents ..................................................................................................... 10
Section 2: Reconcile Your Federal Withholding .................................................................................. 11
Section 3: Verify Your Identity ............................................................................................................ 11
Section 4: Signing the Return ............................................................................................................. 12
Section 5: Paying a Balance Owed..................................................................................................... 13
Review Your Return ............................................................................................................................... 14
Print the Return .................................................................................................................................. 14
Reviewing Incomplete Forms ............................................................................................................. 14
Continue to E-File Button ....................................................................................................................... 14
Print Your Return for Your Records........................................................................................................ 15
Filing an Extension (Form 4868) ............................................................................................................ 15
Form 4868 .......................................................................................................................................... 15
Form 2350 .......................................................................................................................................... 15
Help with Free File Fillable Forms .......................................................................................................... 16
Rejected Returns ................................................................................................................................ 16
Functional Issues (All Issues except Rejections) ................................................................................ 16
Accepted Returns ............................................................................................................................... 19
Other Issues and Assistance ................................................................................................................. 19
4
Free File: Seventy percent of taxpayers have an Adjusted Gross Income (AGI) of $64,000 or
less and are eligible for easy-to-use, brand-name software. Find the right software product for you at
irs.gov/freefile
. Free File Fillable Forms has no age, income or residency restrictions; however:
If you are not comfortable with completing a paper return, using only the forms
and instructions as a guide to file a correct return, this program is not for you.
Before Getting Started
Know the program operates yearly from the beginning of the filing season through October 15 each
year. All account information is erased after October 15 and you will not have access to it.
1. Review the Forms and Limitations
page. Although this program supports most forms, if you need
an unsupported form, you will not be able to efile your return. The page also provides form and
program limitations that may prevent you from efiling your return.
2. Check the Computer Requirements. Using non-recommended browsers and operating systems can
result in form display problems, form calculation problems and problems with the information you have
entered.
3. Familiarize yourself with the self-help webpages, which contain answers to the questions and
problems most taxpayers have. Easy navigation to the help you want begins with the Help
link on our
main page.
What You Will
Need:
Have the following on hand before you start.
•
Social
S
e
c
urity Numbers for all persons on your tax return
•
Birth dates for all persons on your return
•
The Adjusted Gross Income (AGI) from last year’s federal tax return. See Section 3: Verify
Your Identity, if you do not know last year’s AGI.
•
A valid email address
Create Your Account
1. Select “Start Fillable Forms Now” from the Free File landing page.
2. Once at the Free File Fillable Forms landing page, select “Start Free File Fillable Forms.”
3. Even If you used this program in previous years, if you have not created an account for the
current tax year, you need to “Create an Account” for this year.
4. Complete all the required information and select “Create Account”
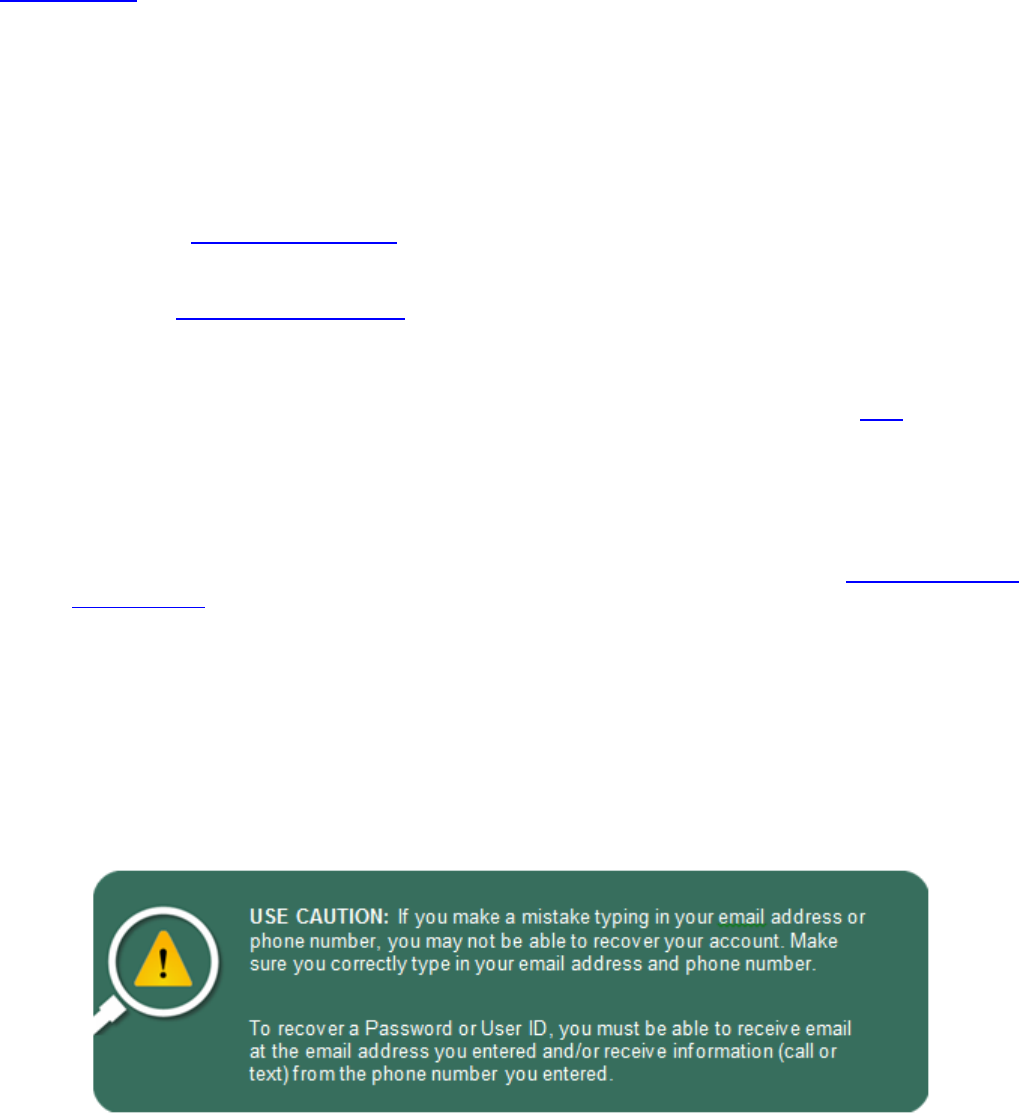
5. A User ID requires a minimum of four visible keyboard entries, containing no spaces or commas.
The green check only indicates that the UID provided is not already stored in the database. If an
invalid User ID is entered and “Create Account” is clicked, an “Invalid Character” message
appears at the top of the page.

5
address used to create the account. Use the email to verify your email address. If you do not
receive this email,
view this information.
Select Your Main Form
Make your main form selection- Form 1040, Form 1040A or Form 1040EZ. A brief description of each
main form, and who can use them, is available at the time of selection. If you select the wrong
main form, switching to another main form will erase all of your tax
information.
To file an extension (Form 4868), select a main form, then select the “File an Extension” button.
Enter your name, address and Social Security Number, and then complete the rest of the form.
Transmit the extension by completing the efile section below the form information.
Selecting Areas to Enter Information
Moving within the Forms — Use your mouse or pointing device to select icons, buttons,
checkboxes, menu items and to select a space to enter information. Use the scroll bar to view more of
the form you have selected.
Entering your Information — Placing your mouse or pointing device over an entry area may
display text about what to enter. You may also use the tab key to navigate through the form. To move
backward to a previous area, hold down shift and then push the tab key.
1. View the Tip and Cautions below for Browser Back Button, Negative Numbers (Losses) and
entering Zeros.
2. Never add forms that do not apply to your tax situation.

6
Types of Information Areas on the Forms
Manual Entry Fields — Select an area to enter information and a blue box will surround it, with a
blinking vertical line to indicate where you are entering your information
.
Drop-Down Menu (or pick-list) — A down symbol
indicates these area. The items to select
are limited to acceptable information. If you don’t understand the choices, the area probably doesn’t
apply to you. If a menu item you expect to see is not listed, consult the form instructions, review the
Forms and Limitations page and review the Line-by-Line instructions
for the program.
Calculated Fields
—
These areas will calculate when you enter the required information in other
parts of the return and select “Do the Math.”
•
Sometimes you can manually enter a number into a calculated field if you have not yet completed
the form that transfers information to the calculated field. However, once that form is completed,
its information will transfer to the calculated field.
•
You cannot override a calculated field unless you change the data used to make the calculation.
•
Calculated field information may come from a completed field on any form you have added.
•
Calculated fields sometimes require you to enter something into the “additional information” areas
before they will calculate.
Radio Buttons
— These are small round circles similar. You “Fill in” the circle to provide information.
You may only select one radio button from the associated group.

7
To
fill
in t
h
e
ci
r
cl
e
:
• Use your mouse- Place your cursor on the circle and “left click” or
Tap the touchpad on your laptop
• Selecting another radio button from the group will also de select
your previous selection
• To de-select a radio button without making another selection from
the group, place your cursor on the radio button and “double
click.”
Checkboxes — These are similar to radio buttons, except you may
select multiple checkboxes within the group.
Additional Information Areas — There are times when you are instructed to enter additional
information on the form. You may enter this additional information into the small gray areas on any given
line.
The form instructions will state you should enter and the order you enter the information. In most cases,
you will enter a description of the item and a corresponding amount, in that order. In the amount areas,
you may only enter numbers. Always consult the form instructions before entering information in these
areas.
Placing your cursor in the area may provide information on what you should enter. Never enter any
information in these areas unless instructed to. Extraneous zeros or entering such things as “N/A” will
cause your return to reject. Reviewing the Line-by-Line instructions
may also assist with these
areas.
Description Area — Some description areas have a drop-down menu to assist entering
acceptable information. Most taxpayers do not need to enter information in these areas. If you do

8
not recognize the menu items, enter nothing and review the form instructions that pertain to your
tax situation.
Amount Area
—
Some amount areas do not have a corresponding description area. Never enter
an amount, leaving a corresponding description area blank.
See the Example Below: Line 21 has two additional information areas: (1) A description area and (2) an
amount area.
This example also shows a calculated field with the “Do Not”
symbol
and
t
h
e
n
o
t
i
c
e
that
line
21
is a
c
a
l
c
u
l
a
t
e
d
fi
e
ld
.
For line
21
to
c
a
l
c
u
l
a
t
e
, you must enter t
h
e “Other Income” amount in the appropriate area and select
“Do the Math.” In the designated area, you must also enter a corresponding description for the
other income, otherwise, the return will reject.
Attaching Statements
— This program does not support attaching statements. If you are
instructed to attach a statement to clarify an entry, you will not be able to efile your return.
Tabs, Links, Buttons and Icons
This is how you open forms, get help, change your account information, save your information and
submit (efile) your return.
1.
STEP 1
— The active default page when you begin a tax return. The blue color indicates the tab
is active. You will be on STEP 1 when completing forms and schedules, except for income
documents (W-2, W2-G and 1099-R).
2.
STEP 2 — Select this tab to add income documents (W-2, W2-G and 1099-R) and to begin the
process of filing your return electronically (efile). Review STEP 2 in its entirety beginning on page
X.
3.
File an Extension
— Opens Form 4868 and the efile process for filing the extension. Note-
The program does not support this Form 2350, Extension for U. S. citizens and resident aliens
living abroad, file this form.
4. Help
— Opens a new browser and takes you to an IRS page that will assist with how forms are
supposed to function. The
Line-by-Line instructions
page provides information on the most

9
commonly used forms. The
Forms and Limitations
page provides information on what is
supported, when it’s available and problems you may encounter when using the form.
5. IRS Publications
— Opens a new browser and takes you to an IRS page where you can view
and download forms, instructions and publications. You cannot attach and efile forms and
schedules downloaded from the IRS page.
6.
Interactive Tax Law Assistant
— Takes you to a tax law resource page, which walks you
through a series of questions and provides you with responses to tax law questions.
7. Update Your Account
— Takes you to a page where you can update the information you
entered to establish your current account.
8. Sign Out — Saves all the information you have entered thus far and logs you out of your
account.
9. Save
— Saves all the information you have entered thus Far. Note, if you save and any of your
information disappears, you have a browser compatibility issue. See the
Computer Requirements
page.
10. Print Return
—Open a new browser window and displays your tax return as a pdf file for
printing. You may also use this function to save a copy of the return to your computer. Any
missing forms or schedules indicate the missing documents were not completed. Missing
documents will not transmit to the IRS with the return. Some documents (W2, W2-G and 1099-R)
are not supposed to print with the return.
11.
Add/View Forms
— Allows you to add, view and delete forms and schedules. Selecting a
form makes it the active form.
Added forms are stored in “My Tax Forms.” Forms seen in “My Tax
Forms” are not necessarily completed forms and may not transmit with your return. (See “Print
Return,” above.).
12.
Start Over
— Allows you to select another main form. Selecting another main form
permanently deletes the information you have entered on the present main form.
13.
Check efile Status
— Opens a page where you can enter information about yourself and
determine the status of your efiled return.
14. FAQs
— Opens a new browser and takes you to Frequently Asked Questions about the
program.
15. Instructions for This Form
— Opens a pdf file in a new browser window, which contain the
IRS form instructions for the form you are currently viewing
.
16.
Do the Math
— Calculates all fields on the form, currently viewed, which have the required
elements entered to make the calculation. It also saves your work. We recommend you save your
work often
.
17.
Delete This Form
— Deletes the form currently viewed. You can add the same form later;
however, you will have to re-enter all the information again.
18.
Print This Form
— Opens a new browser window and displays the form, currently viewed, as
a pdf file. You can print and/or save the form to your computer from this window.
19. Done With This Form
— Closes the form currently viewed and returns you to your main
form. It also “Saves” your work. The button is not functional when viewing the main form. Select
the STEP 2 tab if you have completed your return and want to begin the efile process.
Add and Delete Forms
You cannot add every form and schedule in the two methods described below.
• Add income documents (W2, W2-G and 1099-R) from STEP 2.
• You must add some forms and schedules only from a “parent” form. For example: You may only
add Form 4562 from its “Parent” Schedule C, E and F
Check the Forms and Limitations
page to see all supported forms and the dates they become available.

10
Add Forms — Two methods:
1. Add/View Forms Icon
– Select the “Add/View Forms” icon to open the “My Tax Forms” list.
a. Select “Add a Form” from the bottom of the “My Tax Forms” box.
b. Scroll the list of forms the select the form you want
c. Some forms have “Taxpayer” and “Spouse” versions. Select the correct version.
d. You cannot add some forms/schedules with this method
2.
Add Button
– Select the “Add” button for the form, if there is on for it on the viewed page.
a. “Add” buttons are usually placed conveniently on the line that will accept the information
from the added form.
b. Not all supported forms and schedules have “add” buttons
Deleting Forms — Two methods:
Delete this Form Button – If the form you want to
delete is displayed, delete it by selecting the “Delete
this Form” button, at the bottom of the page.
Add/View Form Icon
– Select the “Add/View
Forms” icon from the top of the page, which opens
“My Tax Forms”
a. Select “Delete a Form” to bring up the list of
forms
b. Scroll the list and click on the form you want to delete
c. Select “Yes” from the pop-up box, asking if you are sure you want to delete the form.
STEP 2 – Preparing to E-File Now
STEP 2 has five sections. Three sections (2, 3 and 4) prepare your return for submission to the IRS and
everyone must complete these sections. The remaining two sections are optional and depend on
whether you have income documents (W2, W2-G or 1099-R) or have a balance you want to pay
electronically.
Section 1: Add Income Documents
— Enter the information from your income documents (W-2,
W2-G and 1099-R). Use the “Add” button for each type of income document. If you have more than one
W-2, W2-G and 1099-R, return to STEP 2 Section 1 and select the “Add” button again, for each of the
paper documents you received from the employers/payors.

11
• If you haven’t any W-2, W2-G and 1099-R forms, you can skip Section 1.
• Enter the information and amounts exactly as it appears on your paper documents.
• There is no “Add” button for any other 1099 forms, such as SSA-1099, 1099-RRB, 1099-MISC,
etc. It is not necessary to enter theses other 1099 documents as you do for the 1099-R.
Section 2: Reconcile Your Federal Withholding
— You must reconcile the amount of federal
withholding you claim on your main form with the federal withholding you entered for the income
documents you added in STEP 2 Section 1 above.
Remember, this is about FEDERAL WITHHOLDING only!
A. Look at your paper W-2, W2-G and 1099-R documents, total the
federal withholding and enter that amount in Box A
B. Look at all your other income documents that show federal
withholding, total the federal withholding from those documents
and enter that figure in Box B.
C. If you completed Form 8959 and there was a federal withholding
amount on line 24, that number will transfer to Box C.
D. Box D calculates when you select “Do the Math”
E. Box E reflects the amount of federal withholding you entered on your main form
Boxes D and E must match to proceed. If they do not match, you have made a mistake in the amount of
federal withholding you entered on your main form or the amounts you entered in Boxes A and B are
wrong. Perform the reconciliation again.
Note: If you are filing Form 1040A or Form 1040EZ, you cannot file Form 8959; therefore, Boxes C and
D must match
Section 3: Verify Your Identity
— The IRS needs to
authenticate that you are the taxpayers whose Social Security
Numbers appear as the Primary and Secondary (if married filing
jointly) on this return.
Enter last year’s AGI in the space provided. If you are filing jointly and
you filed jointly with the same spouse last year, the AGI for the
Taxpayer and Spouse will be the same. If last year’s return was not
filed jointly with your current spouse, the AGI must be taken from the
separate returns.
If you did not file a return last year, enter “0” for your AGI.
If you do not know what last year’s AGI is, get help retrieving it
. Alternatively, if you can remember the 5-
digit signature PIN you used last year to sign your return, you can enter it in the space provided. If you
cannot obtain the correct AGI, you must mail in your return to the IRS. See the instructions for a mailing
address

12
Section 4: Signing the Return
—
You need to provide the following information and, if filing jointly,
the Spouse needs to provide information also.
a) Enter your email address, twice
b) Enter the date you are transmitting your return (Today’s Date)
c) Enter an optional cell phone number
d) Make up a five-digit Signature PIN and enter it into the designated area. It can be any five
numbers except 00000 or 12345.
e) Enter your Date of Birth. The date format is MM/DD/YYYY. If you are the Primary taxpayer on the
return, are under age 16 and have never filed a federal return before, you must mail in your return
or use a professional tax preparer who is an Authorized IRS efile provider.
To increase your protection against fraud, complete the areas for driver’s license or state issued ID, if
you have those documents.
If you are receiving a refund or if you are not paying a balance you owe with Direct Debit, scroll past
Section 5 “Payment to the IRS” to reach the “Continue to E-File” button.
Remember to print and check your return for errors before transmit your return to the IRS. Once the
return is transmitted and accepted by the IRS, you cannot efile the return again. See Amended Returns.

13
Section 5: Paying a Balance Owed
—
If you have a refund coming to you, do not enter any
information in this section.
If you owe a balance on your return, you can pay by
A. Direct Debit (Pay by Electronic Funds Withdrawal)
B. Check
C. Direct Pay
You can also explore other payment options from the IRS Payment
webpage https://www.irs.gov/payments
Direct Debit (Electronic Funds Withdrawal) – This method is the most convenient payment method
and linked to your accepted return. To make a direct debit payment
1. Enter your Routing Number
2. Enter your Account Number
3. Select either the Checking or Savings Radio Button
4. Enter the withdrawal date (format MM/DD/YYYY)

14
5. Enter a ten-digit daytime phone number. NOTE: If you have a foreign phone number, enter the
first ten-digits of the phone number
6. Check the “I Agree” checkbox
7. Print and check your return before you select the E-File
Now button
Check – Print Form 1040V (Payment Voucher) and make sure
the payment is postmarked by the due date of the return.
Payment addresses are in the 1040 instruction book.
Direct Pay – Pay the balance on your return and make
estimated tax payments.
https://www.irs.gov/payments/direct-
pay
Review Your Return
Prior to selecting the “E-File Now” button, print and review your return for completeness and accuracy.
Once you transmit the return and the IRS accepts it, the only way to correct mistakes is to mail in an
amended return, Form 1040X
.
Print the Return
–
• Select the “Print Return” icon at the top.
• Check your printed return against the list of forms in
“My Tax Forms”
- Missing forms are not complete
- Some forms are not supposed to print, such as
Form 1040ES, W-2, W2-G and 1099-R
Reviewing Incomplete Forms
–
•
Select the Add/View icon and select the form missing
from your printed return
•
Review the form and it’s instructions for obvious omissions that pertain to your tax situation
•
Review the Line-by-Line instructions for the form for help on how the lines on a form are
supposed to function and idiosyncrasies of the form
•
Make your correction(s)
•
Select “Do the Math” and proceed with STEP 2
Continue to E-File Button
The button is at the bottom of STEP 2, Section 5. Select the “Continue to E-File button after you have
completed all of your forms in STEP 1 and all of the required elements of STEP 2.
After selecting the button, you will receive a message that the E-Filing Information is Incomplete or a
message to complete the CAPTCHA and continue to e-file.
If you receive the incomplete message, you must resolve the problem before you are able to transmit the
return. See Transmission
Problems.
If no transmission problems are detected, complete the CAPTCHA and submit.

15
Once you submit, the “Ready to E-File” screen appears. Check the “I Agree” checkbox and select the
“Transmit my Return” button.
After transmission, you will receive a final screen stating your return has been transmitted and to look for
an email notification about Acceptance or Rejection of your return.
Note: After successful transmission of your return, you will also receive an email confirming the
successful transmission of your return. DO NOT confuse this email with the email stating whether your
return has been accepted or rejected.
Print Your Return for Your Records
After your return has transmitted and you have received notification that the IRS has accepted your
return, print a copy of your accepted return for your records.
IMPORTANT – The Free File Fillable Forms program shuts down every year, on October 20. After that
date, the developer erases all information from the server and you will not have access to your account
or return information.
In addition to saving a paper copy, you may also want to save a “soft copy” of your return on your hard
drive or portable storage device. To save a soft copy, use the “Print Return” icon. When the new browser
opens with your tax return in pdf format, use your browser’s “File > Save as” function to save your soft
copy.
Filing an Extension (Form 4868)
Form 4868
–
After creating an account, select a main form and
then select the “File an Extension”
button. Enter your name, address and Social Security Number, and then complete the rest of the
form. Transmit the extension by completing the efile section below the form information. If
you are
making a payment with the extension, make sure you enter your payment amount on line 7.
Form 2350
–
Not Supported

16
Help with Free File Fillable Forms
Free File Fillable Forms relies on taxpayers using web-based self-assist resources to discover solutions
encountered with the program. Help
follows two paths, (1) Rejected Returns and (2) Functional Issues.
Although not a part of Free File Fillable Forms support, this section will also address questions about
accepted returns.
Rejected Returns
–
The Internal Revenue Service will either accept or reject the return after you transmit (submit) it. You will
receive an email from customer_service@free_file_fillable_forms.com when the IRS rejects your return.
This email will lists the reason for rejection (error) and provide a link to use to resolve the rejection issue.
A reason for rejection (error) has two parts:
1. The Business Rule Number and explanation
2. The Xpath
It is important to follow the instructions on the Rejection Help page.
• Copy and paste both parts of the rejection into the search box
• If you have multiple errors, search one error at a time
Functional Issues (All Issues except Rejections)
–
If we discover a software issue that prevents you from completing or submitting (transmitting) your return,
we will place the issue in the table on the Functional Issues
page. The table will describe the problem
and provide a “Tentative Fix” date.
1. The Line-by-Line Instructions page provides information on how the most commonly used forms
work. Many times, taxpayers believe they have encountered a software “bug” or “glitch” because
they are not familiar with program idiosyncrasies. This page is your best resource for determining
how something is supposed to work or why it is not working the way you believe it should.
2. Free File Fillable Forms supports most, but not all forms and schedules. Some of the supported
forms and schedules have limits, which may prevent you from completing or transmitting your
return. The Forms and Limitations
page will let you know
a. What forms and schedules are available
b. When the forms and schedules will become available
c. Limitations that may prevent you from successfully completing the return
3. Our Account Issues page provides basic information on the most common problems taxpayers
have with creating or accessing their Free File Fillable Forms account. Many times, the issue is
caused when attempting to create or access an account using an unsupported browser or
operating system. Using non-recommended operating systems and/or browsers will expose you
the risk of experiencing technical issues that you may not be able to resolve later, without
switching to a recommended browser. Always comply with the recommendations on our
Computer Requirements page.
a. Error 500 Code - This is a website server error. The error is generally temporary (15 minutes
or less). Once the host notices and corrects the error, you can access your account and
continue working on your return. If you continue to receive the error, repeat the event that
caused the error to occur and reply
with the following:
• The error message, including the ID number
• The date and time the error occurred (please note your time zone)
• The user ID and email address you are using for the account

17
• Your computer operating system
• The browser and browser version you are using
b. Error 503 Code - When you experience Free File Fillable Forms account access issues
and/or have difficulty creating your account and experience a “Code 503” error message,
please read the following list of items to check, review, and/or correct in order to proceed:
• Close all other programs and browsers other that the browser you are using to access
your account.
• Clear your browser’s history before your next attempt to access or create your
account.
• Create/use a one-word User ID of at least 4 characters (i.e.,
[email protected]). Do not use of diacritics, accent marks, language-
specific punctuation and quotation marks. A valid email address is acceptable.
• Create/use a one-word, 8-character password with at least one number and one
special character (i.e., #, $, *, !). Do not use of diacritics, accent marks, language-
specific punctuation and quotation marks.
• Double check the accuracy of the security question selected & the accuracy/spelling of
the answer you provide.
• Ensure that ALL required CREATE ACCOUNT fields have been filled-in before
pressing the CONTINUE button.
• When prompted, be sure to print the account login information, record your User ID,
password and security question answer exactly as entered for your records.
c. Changing Account Information - Click the ‘Update Account’ link on the upper right navigation
bar.
d. Deleting Your Data - If you have not successfully e-filed your return, you can delete your data
by selecting the Start Over option and then sign out of the return. This will erase any tax
return information you entered.
e. Not receiving expected email - If you did not receive a confirmation email when you created
an account, it is possible your spam filter is blocking the email. Check your spam folder and
look for an email from custom[email protected]
f. Not receive an acknowledgement email - The email should arrive within 2 hours after you
successfully transmit your return. It takes longer the closer you get to April 15. If you do not
receive this email within 24 hours, do the following:
• Make sure you are checking the same email account you entered in Step 2, (the E-file
Your Tax Forms screen) when you submitted your tax return
• Check your spam filter or junk mail folder for email from
customer_service@freefilefillableforms.com
• If you still have not received an email you can check your return status by selecting
the “Get E-file Status” link on the left hand navigation, just under the FAQs link on the
Free File Fillable Forms.com landing page. Enter your Social Security Number and zip
code that was on the e-filed return. If the program shows no status, you have not
successfully transmitted your return.
4. Transmission problems occur after you select the “Continue to E-File” button and prevent
submission of your return to the IRS. They are difficult to diagnose because the software is not
currently able to pinpoint where the error has occurred and the error can occur anywhere in the
STEP 2 process or in the name and address section of your return. Transmission errors may also
occur because you are using an incompatible browser or it could be as simple as you’re your

18
internet connection stopped working. Review the Transmission Problem
page for a list of things to
check.
5. Printing, Display and Miscellaneous Forms issues
a) When you experience Display Issues, you need to review and comply with the recommended
Computer Requirements
. A Print Issue could be a computer requirement issue, an incomplete
form or simply a form that is not supposed to print. (See Review Your Return) The Print and
Display Issues page lists some of these issues and their likely causes.
b) Entered Information Disappears- If you are using a recommended browser and are using the
browser’s auto-fill or add-on, such as Incognito or In Private, turn them off and then perform
these steps:
• Access the form and line causing the problem
• Highlight the entry field causing the problem, hit your “Delete” key, then, with your cursor
still in the area, hold down the “Backspace” key for five seconds.
• Save and exit the program
• Close all browser sessions except one and clear you cache and cookies
• Access your account and complete the form
• Delete the form if this does not resolve the problem
c) Negative numbers (or losses) - We apologize for the lack of consistency regarding the paper
instructions and entering negative numbers in Free File Fillable Forms. Generally, you
precede a negative number with the minus sign (-). There are some instances where you may
calculate a negative number, but the lowest acceptable figure for the line is a zero. Always
review the form instructions regarding the entry of a zero or negative number
d) Worksheets are not part of the functional program. Print, fill them in and enter your results on
the form asking for the worksheet calculation
e) Identity Protection PIN (IP PIN) Free File Fillable Forms supports the IP PIN for the Taxpayer
and Spouse on the return. If the IRS sent you letter with an Identity Protection PIN (IP PIN),
enter that six digit PIN in the area to the right of the “Spouse’s Occupation” (the lower right
corner of your 1040, 1040A or 1040EZ form).
• Make sure you enter the IP PIN into the correct area for the “Taxpayer” or “Spouse”,
otherwise, your return will reject.
• An IP PIN for a Dependent is not supported. If your dependent has an IP PIN, you will
have to mail in your return.
g) Information Transfers Forms have a hierarchy relationship. (Example: Form 1040 is the
“parent” form to Schedule D and Schedule D is the “parent” to Form 8949) Figures from your
“parent” form may not transfer to subordinate forms unless you complete the parent form to
the point where you should add the subordinate form. The completed information on the
parent form would include all the personal information on your Form 1040, 1040A or 1040EZ
(Name, Address, SSN, Filing Status, Exemptions and Dependents)
h) Writing in information – The instructions for some lines may tell you to write certain
information somewhere on a line. Use the small grey areas, on the line, for this. See the
User's Guide
i) Calculations
• Calculated Fields – Some lines calculate for you. If you can manually enter a number on a
line, do not expect it to calculate for you. To get a number to calculate on the line, you

19
must first complete the lines, which should be included in the calculation and then select
“Do the Math.” If a line is calculated, you cannot override the calculation
• Incorrect Calculation - Calculations derive from information entered on other lines, so
make sure that information is correct. Once you have verified the miscalculation is not a
function of your entries, contact us about the issue.
6. International / Military / Foreign Filers – Review our International Filer’s page for assistance with
particular forms and entering addresses.
Accepted Returns
–
Once the IRS has accepted your return, you cannot interrupt acceptance processing. Processing usually
takes 21 days or less. Any issue that arises after you receive an email that the IRS has accepted your
return is an issue between you and the Internal Revenue Service.
• Incorrect Bank Routing Number or Account Number – You should contact your bank if you
entered the correct routing number and the account number is incorrect to determine if the
incorrect account number belongs to someone else. If the IRS determines it cannot direct deposit
the refund, you will receive a paper check. Call 1800-829-1040 for more assistance.
• Balance Owed Returns – Review your bank transactions to ensure payment was processed. It is
the policy of the Internal Revenue Service to process payments as soon as possible. If you
payment was not made, check with your financial institution and call IRS customer service at
1800-829-1040.
• Refund Returns –
o Check Where’s My Refund?
o If you entered the wrong banking information, check with your financial institution and call
IRS customer service at 1800-829-1040
• Amended Returns (Form 1040X) – If you have discovered a mistake on your return, review
Tips
for Filing an Amended Return. Amended returns are filed on paper and mailed in.
Other Issues and Assistance
We suggest you start your search for assistance on the Tax Information for Individuals page.
Do you think you are a victim of ID Theft?
Tax Law Help - If you need help understanding what information you should enter on a line, refer to the
IRS instructions for the relevant form or schedule. There is a link for these instructions at the bottom of
each Free File Fillable Forms screen. Publication 17 is also a useful resource for information. The help
available for this program, Free File Fillable Forms, does not include interpreting the tax code or other tax
assistance. For more assistance with answering Tax Law Questions, consider these resources:
• Use the Interactive Tax Assistant
• Visit an IRS local Taxpayer Assistance Center
• Use Tax Topics to investigate specific tax issues
• Call Tele-Tax toll-free, available 24 hours a day, 7 days a week at 800-829-4477 to hear
prerecorded information about various tax topics in English or Spanish. Tele-Tax topics begin at
page 93 of the Form 1040 Instructions.
• Access the IRS website and enter your KEYWORD to search for your tax topic
• If you still need tax law help, contact the IRS, toll-free at 800-829-1040
• If you have a hearing impairment, contact the IRS, toll-free at 800-829-4059 (TDD)
• If you live outside the United States, visit the International Services page on IRS.gov
