
Formatting your
Thesis/Dissertation in
Word 2007
presented by
Client Support Services
Division of Information Technology
University of Wyoming
Information Technology

2
Table of Contents
STYLES ........................................................................................................................................................... 3
Using the Quick Styles Gallery .................................................................................................................. 3
Applying Styles .......................................................................................................................................... 5
Creating a Style ......................................................................................................................................... 8
Adding a Style to the Quick Styles Gallery .............................................................................................. 10
Editing an Existing Style .......................................................................................................................... 12
SECTION BREAKS ........................................................................................................................................ 14
Working with Section Breaks .................................................................................................................. 14
Inserting a Next Page Break .................................................................................................................... 15
Formatting a Section ............................................................................................................................... 16
Inserting a Continuous Break .................................................................................................................. 17
Inserting an Odd/Even Page Break ......................................................................................................... 18
Modifying a Section Break ...................................................................................................................... 18
Inserting a Manual Page Break ............................................................................................................... 19
CHANGING THE DOCUMENT MARGINS ..................................................................................................... 21
PAGE NUMBERING ..................................................................................................................................... 23
Inserting Page Numbers using the Gallery .............................................................................................. 23
Creating a First Page Header/Footer ...................................................................................................... 24
Alternating Odd and Even Headers/Footers ........................................................................................... 25
Setting the Starting Page Number .......................................................................................................... 27
CREATING A TABLE OF CONTENTS ............................................................................................................. 29
Generating a Table of Contents .............................................................................................................. 30
Removing a Table of Contents ................................................................................................................ 31
Updating a Table of Contents ................................................................................................................. 32
CREATING A TABLE OF FIGURES ................................................................................................................. 34
Inserting a Caption .................................................................................................................................. 34
Inserting a Table of Figures ..................................................................................................................... 35
Updating a Table of Figures .................................................................................................................... 37
3
STYLES
Using the Quick Styles Gallery
Discussion
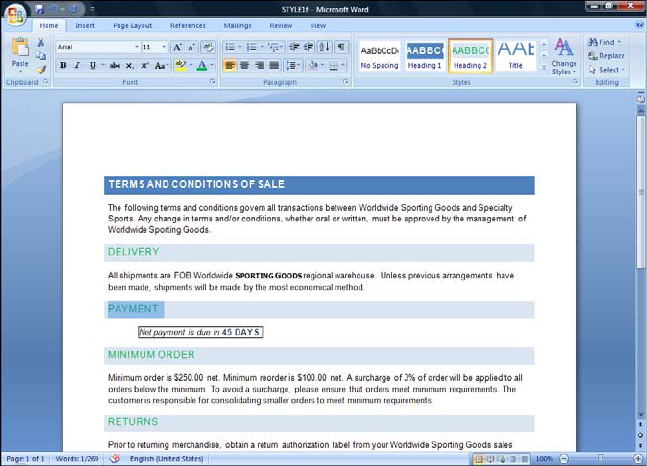
A style is a group of formatting attributes that are saved with a style name. Styles make it
simple to format text and paragraphs consistently. For example, if you format the subtitles in
your document with a Tahoma 28-point font, small caps, and 16 points of space above and
below the subtitle, you can create a style containing these attributes. Thereafter, you can easily
format a new subtitle in one step, simply by applying the style to selected text.
There are three types of style: character, paragraph and linked paragraph, and character. You
can apply styles as you type, or you can apply styles to existing text. Applying a style adds all
the formatting attributes contained in that style to the selection.
The Quick Styles gallery, located in the Styles group on the Home tab, provides a rapid
method of previewing and applying styles to selected text. Furthermore, Word provides
predetermined sets of styles that work together well. These are called Style Sets and are
applied to an entire document. You can choose an appropriate style set for your document and
the styles that make up the style set are then made available in the Quick Styles gallery.
You can also open a Styles window by selecting the Styles dialog box launcher on the Home
tab menu. Unlike the Font and Paragraph dialog boxes, the Styles window can be left open
while you access other options. It can also be docked on either side of the document area by
dragging it off to one side or the other.

4
The Quick Styles gallery
The Quick Styles gallery is laid out in a number of rows. You
can see the entire gallery by using the scroll buttons on the
right of the gallery or by clicking on the Quick Styles Gallery
list button.
The style of the currently selected text is highlighted in the
Quick Styles gallery on the Home tab and in the Styles
window if it is open.
Procedures
1. Select the Home tab.
2. Select the Styles dialog box launcher .
3. Pick up the Styles window so that it can be repositioned in a
convenient location.
4. Drop the Styles window in a convenient location.

5
5. To view the style applied to specific text, position the insertion point
in the desired text.
6. To find all text formatted with a specific style, right-click the style
you want to find in the Quick Styles gallery.
7. Select the Select All # Instance(s) option.
8. Position the insertion point elsewhere in the document to deselect
the text.
9. Close the Styles window.
10. Select the Change Styles button in the Styles group on the
Home tab.
11. Select the Style Set option.
12. Hover the pointer over any style set to preview the formatting.
13. Select a style set to apply to the document.
Applying Styles
Discussion
The Quick Styles gallery enables you to quickly apply an existing style to selected text. This
helps to ensure that all the headings, subheadings or paragraphs of text in a document are
consistent in appearance and will remain consistent if a style is updated later.
You can apply any of the many styles already set up in Word 2007, or you can apply any
styles that you have created or modified.

6
The expanded Quick Styles dialog box
Another good reason to apply styles to your document is that
it allows you to benefit from other features in Word 2007. For
example, applied styles allow you to quickly create a Table of
Contents that can then be easily updated, or to use Outline
View to get an overall view of the structure of your
document.
When exploring the list of styles available, you can hover the
pointer over any style to see it previewed in your document.
The style is only applied when you click to select it. If you
accidentally click the style, you may not always notice that a
change has been made. Although this action can be undone,
be careful to only click when you mean to apply a style.

7
Procedures
1. Select the Home tab.
2. Click in the paragraph that you want to apply a style to.
3. Click the required style in the Quick Styles gallery.
4. Drag to select the text that you want to apply a style to.
5. Release the mouse button.
6. Click the More button to view the styles available.
7. Click the required style.
8. Click in the document to deselect the text.

8
Creating a Style
Discussion
The Quick Styles gallery provides a number of styles, organized into style sets, for you to use.
These have been designed to offer a wide range of attractive and functional options for you to
use in various circumstances. However, you may wish to create a new style in order to present
some text in a particular way.
The Create New Style from Formatting dialog box
The new style will be available only within the document in
which you create it. To make the new style available to other
documents as well, select the Manage Styles button in the
Styles task pane, then select Import/Export to access the
Organizer.
9
Procedures
1. Select the Home tab.
2. Drag to select the text that you want to apply a new style to.
3. Release the mouse button.
4. Format the text as desired.
5. Point to the selected text.
6. Click the right mouse button.
7. Point to the Styles option.
8. Select the Save Selection as a New Quick Style... option.
9. Type a name for the new style in the Name text box.
10. Select OK.

10
Adding a Style to the Quick Styles Gallery
Discussion
The Quick Styles gallery, located in the Styles group on the Home tab, provides a rapid
method of previewing and applying styles to selected text. Word populates this gallery from
its extensive library of styles, of which there are over 200 to choose from. When you select a
different Style Set to use with your document, the Quick Styles gallery is repopulated with the
styles associated with the selected Style Set.
You can also add a style to the Quick Styles gallery, perhaps one that you use regularly but
does not appear in the gallery or one that you have created yourself, or one that has been
removed and you want to replace.
The options pop-up for styles
In the Styles task pane, the styles are listed with an icon to
the right of each. These signify the style type, character styles
being marked with paragraph styles with and linked
paragraph and character styles with .

11
When exploring the list of styles in the Styles task pane, you
can examine the style specification by pointing to a style
name. When doing this you can also access the options menu
by clicking the list arrow that appears on the right of the
highlighted style.
When exploring the list of styles in the Styles task pane, if you
click on a style, the style is immediately applied to the text
that is selected or to the paragraph in which the insertion
point is located. Be sure to right-click instead, unless you
want the style to be applied to the document immediately.
Procedures
1. Select the Home tab.
2. Select the Styles dialog box launcher .
3. Select Options....
4. Select the Select styles to show: list.
5. Select the All styles option.
6. Select OK.
7. Activate the shortcut menu for the desired style in the Styles
window by right clicking on the desired style.
8. Select Add to Quick Style Gallery.
12
Editing an Existing Style
Discussion
The Quick Styles gallery provides many styles for your use, organized into style sets designed
to suit different purposes. You can also create entirely new styles. However, there may be
times when you wish to adjust or edit an existing style within a document in order to meet a
particular formatting need.

13
Edit an existing style
When you edit a style, all text formatted with that particular
style will be updated automatically. Before proceeding, think
about whether you want the change to apply throughout the
document, or just in one instance.
Procedures
1. Select the Home tab.
2. Drag to select any text with the style that you want to edit.
3. Release the mouse button.
4. Format the text as desired.
5. Point to the style in the Styles group on the Home tab.
6. Click the right mouse button.
7. Select the Update [Style] to Match Selection option.

14
SECTION BREAKS
Working with Section Breaks
Discussion
A section is a portion of a document and can include as little as one paragraph or the entire
document.
Usually, you create a section in order to format it differently from the rest of the document. If
you want to change the margins, page layout, page orientation, column formats, page
numbering, or headers and footers within part of a document, you can do that within a new
section.
In Print Layout view, a section break is only visible when you show the formatting marks. In
Draft view, a section break is always visible. It appears as a double dotted line in the
document and is identified by the words Section Break, followed by the type of break in
parentheses.
A Next Page section break in Print Layout view

15
You can review section formatting by opening the Reveal
Formatting task pane (available via the Style Inspector task
pane) and expanding the Section heading. In addition, you
can click the Margins, Layout, Paper, or Header and Footer
heading in the Reveal Formatting task pane to open the Page
Setup dialog box.
Inserting a Next Page Break
Discussion
You can create a section that starts from a new page by inserting a Next Page section break.
For instance, you may need to print one page of a document in landscape orientation and the
rest of the document in portrait orientation. To perform this task, you can create one or more
Next Page sections and adjust the page layouts for each section as desired.
The Section Breaks menu

16
Formatting a Section
Discussion
After you have created a new section, you can set different margins, page layouts, page
orientations, column formats, page numbering, headers, and footers for each section in the
document.
Section formatting is stored in the Section Break mark found at the end of each section.
Many of the dialog boxes used to create page formats contain
an Apply to list from which you can choose how you want the
page format to be applied. The choices can include Whole
Document, Selected text, This section, or This point forward.
You can copy and paste section breaks to reproduce the
section formatting in another area of the document.
Before you apply any page formatting, the insertion point
must be positioned in the section you want to format.
Procedures
1. Position the insertion point in the section you want to format.
2. Select the Page Layout tab.
3. Select the launcher arrow button in the Page Setup group.
4. Select the desired tab.
5. Select the desired options.
6. Select the Apply to list .
7. Select the desired option.
8. Select OK.

17
Inserting a Continuous Break
Discussion
To create a new section on the same page as the previous section, you must insert a
Continuous section break. You would use this type of break to create multiple layouts on the
same page. For instance, you might insert a Continuous section break to add newspaper style
columns to one part of a page.
Continuous sections with different margins
Procedures
1. Position the insertion point where you want to begin the new
section.
2. Select the Page Layout tab.
3. Select the Breaks button in the Page Setup group.
4. Select the Continuous option. and

18
Inserting an Odd/Even Page Break
Discussion
You can create an Even Page section break to begin a new section on the next even-numbered
page or an Odd Page section break to begin a new section on the next odd-numbered page.
For instance, you might want to begin the first page of each chapter on an odd-numbered page.
If necessary, Word prints a blank page to force the section to the next even-numbered or odd-
numbered page.
Procedures
1. Position the insertion point where you want to begin the new
section.
2. Select the Page Layout tab.
3. Select the Breaks button in the Page Setup group.
4. Select the Odd Page or Even Page option.
Modifying a Section Break
Discussion
You can use the Page Setup dialog box to change the type of section break used in a
document. Additionally, you can change the format of a section by modifying its margins,
orientation, or layout.
You must position the insertion point within the section you want to modify in order to change
the section type or formatting.
You can also open the Page Setup dialog box for a section by
double-clicking the section break below the section you want
to modify or by selecting a Section attribute heading in the
Reveal Formatting task pane.

19
Procedures
1. Position the insertion point in the section you want to format.
2. Select the Page Layout tab.
3. Select the launcher arrow button in the Page Setup group.
4. Select the Layout tab.
5. Select the Section start list .
6. Select the desired option.
7. Select OK.
Inserting a Manual Page Break
Discussion
When typed text exceeds the number of lines that will fit on a page, Word inserts an automatic
page break. There may be times, however, when you want to insert a page break manually.
For example, you may want to keep a heading with the text below it. Word provides this
capability.
You can distinguish an automatic page break from a manual page break by its appearance in
the document. In Draft view, an automatic page break appears as a dotted line. A manual page
break, on the other hand, displays the words Page Break in the middle of a dotted line.
If you add or remove text or alter the page layout in any way, automatic page breaks adjust
accordingly; manual page breaks do not.

20
Inserting a manual page break
To insert a manual page break, position the insertion point
where you want to begin a new page and press the
[Ctrl+Enter] key combination.

21
CHANGING THE DOCUMENT MARGINS
Discussion
Margins define the typing area on a page. They control the amount of blank space between the
text and the top, bottom, left, and right edges of the paper. By default, margins are measured
in inches. The larger the margin measurement, the smaller the typing area. For example, if all
the margins are set to .5 inch, there is a half-inch of blank space on all edges of the page. You
can select different dimensions for the top, bottom, left, and right margins, if desired.
You can modify margins on the Margins tab in the Page Setup dialog box. You can use the
margin spin boxes to select the margin width or you can type the desired width directly into
the box.
The Margins tab offers several other options. The two Gutter options provide additional
space at the top or side margin to prevent text from being hidden when a document is bound.
The Multiple pages list provides several options for managing large documents, including
Mirror margins, which sets opposite margins for facing pages in two-sided documents. The 2
pages per sheet option splits a single document page into two horizontal or vertical pages,
each containing the same margin settings. This option can be used to create a folded page
handout, such as a flyer. If you wish to print a booklet with multiple pages, you can use the
Book fold option.
Changing the document margins

22
You can also use the horizontal and vertical rulers in Print
Layout view to change margins. Point to the border between
the blue and white areas of the ruler until the ScreenTip
indicates Left Margin, Right Margin, Top Margin, or Bottom
Margin and then drag the border. Holding the [Alt] key as
you drag displays the measurements on the ruler.
You can change the default measurement unit by selecting
the Advanced Word Options using the Office button. You can
select inches, centimeters, millimeters, points, or picas.
In the 2 pages per sheet option, the pages are split
horizontally for a portrait orientation and vertically for a
landscape orientation. When you select the Book fold option,
Word automatically landscapes the document. In addition,
the Sheets per booklet option appears, so that you can select
the number of sheets a booklet will contain.
Procedures
1. Select the Page Layout tab.
2. Select the Margins button in the Page Setup group..
3. Select the Custom Margins... option.
4. In the Top spin box, enter the desired top margin.
5. In the Bottom spin box, enter the desired bottom margin.
6. In the Left spin box, enter the desired left margin.
7. In the Right spin box, enter the desired right margin.
8. Select OK.

23
PAGE NUMBERING
Inserting Page Numbers using the Gallery
Discussion
If you want a document to contain page numbers, Word can automatically number each page
and will then keep the numbering updated as you edit the document. You can insert a page
number into the header or the footer, or into the left or right margins of the document.
Word provides a variety of styles and formats from which you can choose, but once you have
selected one then you can edit the results to suit your needs. You can also add extra text; for
example, if you have inserted a plain number you can then type in the word Page.
You can see the headers and footers in your document when working in Print Layout view.
They will appear to be grayed-out, as you cannot edit them from the body of the document.
You can edit the page numbers through the headers and footers.
Inserting the page number

24
Word will only allow you to insert one page number in each
location; i.e. if you already have a page number in the header
and attempt to add a second one, it will replace the first).
However, it will allow you to insert a page number in each of
the three locations available (header, footer and side
margins), so be careful that you do not end up unintentionally
duplicating the page numbers.
Procedures
1. Select the Insert tab.
2. Select Page Number in the Header & Footer group.
3. Point to the relevant option depending on the required location of
the page numbers.
4. Select an option, based on the desired location and style.
5. Click Close Header and Footer .
Creating a First Page Header/Footer
Discussion
In many documents, the first page has a different header and footer than the rest of the
document. If you have a title page on which you do not want to display the header or footer,
you can choose to have a different first page header or footer.
You can use the Previous Section and Next Section buttons on the Header & Footer toolbar
to navigate between the different headers and footers.

25
Creating a first page header
Procedures
1. Select the Insert tab.
2. Select the Header button or Footer button in the
Header & Footer group.
3. Select the Edit Header or Edit Footer option.
4. Select the Different First Page option in the Options group.
5. Enter the First Page Header or First Page Footer content as desired.
6. Select the Next Section button in the Navigation
group to display the next Header area.
7. Enter the Header or Footer content as desired.
Alternating Odd and Even Headers/Footers
Discussion
Documents that are printed on both sides and bound in book form contain facing pages. You
can create different header and footer content for odd- and even-numbered pages. For
example, you can alternate your page numbers by left-aligning the page number for even page
footers and right-aligning the page number for odd page footers. You can also create odd and
even headers and footers that contain different text.

26
You can use the Previous Section and Next Section buttons on the Header & Footer toolbar
to navigate between the different headers and footers.
Creating an even page footer
Procedures
1. Select the Insert tab.
2. Select the Header button or Footer button in the
Header & Footer group.
3. Select the Edit Header or Edit Footer option.
4. Select the Different Odd & Even Pages option in the Options
group.
5. Select the Next Section button or Previous Section
button in the Navigation group to display the
Even Page Header area, if necessary.
6. Enter the Even Page Header or Even Page Footer content as
desired.

27
7. Select the Next Section or Previous Section button in the
Navigation group to display the Odd Page Header area.
8. Enter the Odd Page Header or Odd Page Footer content as desired.
Setting the Starting Page Number
Discussion
The Page Number Format dialog box allows you to select a number format other than the
default option of 1, 2, 3. Options include letters and Roman numerals. It also enables you to
add chapter numbers to the page numbers, based on the heading styles. You can also control
the page numbering by specifying at what number you wish the page count to begin.
Although Word automatically starts numbering pages at page 1, you can start the page
numbering for your document at a different page number. If your document is to be inserted at
page 5 in a larger document, you can start your first page number at 5 so that the page
numbers in the header or footer agree with the final printed document.
You may also want to reset your page numbers if your document contains a cover page. Page
numbers are usually not printed on the cover page of a document, and the cover page is not
usually considered part of the page count. Therefore, you may want the second page of the
document to be page 1 rather than page 2. You can do this by designating the starting page
number of your document (the cover page) as 0; then, the next page will be considered page 1.
The Page Number Format dialog box

28
If your document contains several front pages that you do not
want included in the page count, you should use section
breaks to control the page numbering and the numbering
styles.
The Format Page Number dialog box is also available from the
Header & Footer Tools tab.
Procedures
1. Select the Insert tab.
2. Select the Page Number button in the Header & Footer
group.
3. Select the Format Page Numbers option.
4. Select the Number format list .
5. Select the desired format.
6. Select the Start at option under Page numbering.
7. Enter the desired starting page number in the Start at spin box .
8. Select OK.

29
CREATING A TABLE OF CONTENTS
Discussion
Many long documents (such as manuals, reports, books, and theses) include a table of contents
to help readers find information. A table of contents lists the topics and subtopics in the
document and usually includes the starting page number of each. (Page numbers are not
always included in shorter documents.)
A table of contents also makes it easier to navigate a long document on screen. Each heading
in the table of contents is a hyperlink to the actual source text in the document. Holding [Ctrl]
as you click any heading automatically takes you to that heading in the document.
Developing a table of contents entails defining the topics and subtopics you want to include,
specifying its appearance, and finally, compiling the table of contents itself. Creating a table of
contents manually can be a very time-consuming process.
The Table of Contents feature, however, makes creating a table of contents quick and easy,
because it formats and generates the table of contents automatically. Word 2007 provides a
gallery with many Table of Contents styles from which you can choose. Word generates a
table of contents from topics and subtopics to which heading styles, outline levels, or user-
defined styles have been applied. You can also mark the text you want to include in the table
of contents and then generate the table of contents from the marked text.
Generally, a table of contents appears at the beginning of a long document. If you create a new
section for a table of contents, you can format it differently from the rest of the document. You
can use a different type of page number (Roman numerals as opposed to Arabic numbers, for
example), set different margins, and/or modify its headers and footers.
If you have included an index and/or a table of figures in the
document, you should generate them before you generate
the table of contents, so that those sections will be included
in the table of contents. If you add these at a later time you
can regenerate/update the table of contents to include them.

30
Generating a Table of Contents
Discussion
The most efficient way to create a table of contents is to apply the built-in heading styles,
Heading 1 through Heading 9, to the topics and subtopics in a document. Each of these
heading styles is recognized by Word as a table of contents entry.
When you build a table of contents based on document styles, Word automatically selects the
complete text of each heading and inserts it into the table of contents, along with the page on
which it appears, if applicable. You can align page numbers to the right margin and include a
tab leader, if desired. A tab leader is a series of characters (usually periods) that appear
between the last character in the table of contents entry and the page number, as shown in the
following example:
Introduction....1
You can specify the number of levels you want the table of contents to display; although the
default is three, you can select up to nine levels.
Word provides several different table of contents formats from which you can choose. Each
format displays the various table of contents levels with different indentations and/or font
styles. Word uses a TOC style to format each level in a table of contents. For example, first
level headings in a table of contents use the TOC 1 style, second level headings use the
TOC 2 style, etc. You can design your own table of contents formats by modifying the
predefined TOC styles.
Inserting a Table of Contents

31
Table of contents entries are also hyperlinks. Holding the
[Ctrl] key as you click a table of contents page number moves
the insertion point to the corresponding document text
Procedures
1. Position the insertion point in the document where you want the
table of contents to be inserted.
2. Select the References tab on the Ribbon.
3. Select from the Table of Contents group.
4. Select the Table of Contents style you want to use.
Removing a Table of Contents
Discussion
If you are not satisfied with the table of contents or, simply wish to remove it, Word lets you
delete a table of contents easily.

32
The Table of Contents gallery
Updating a Table of Contents
Discussion
Once a table of contents has been generated, additional editing changes can make it incorrect
or incomplete. For instance, if you insert manual page breaks or add or delete enough text to
affect the page breaks, the page numbers in a table of contents may become incorrect. Adding,
deleting, or rewording headings can also make the table of contents incorrect.
After you have made changes to a document, you can quickly update the existing table of
contents, rather than having to create and format a new one. You can choose to update the
entire table or only the page numbers.
You can use right-click in to the left or right of the table of
contents to open the shortcut menu. Then, select Update
Field to open the Update Table of Contents dialog box.

33
You can also update a table of contents by positioning the
insertion point in the table of contents and pressing the [F9]
key. This opens the Update Table of Contents dialog box.
Procedures
1. Select the References tab on the Ribbon.
2. Select Update Table button in the Table of
Contents group.
3. Select the desired update option.
4. Select the OK button .

34
CREATING A TABLE OF FIGURES
Inserting a Caption
Discussion
If you have created a document that contains images as well as text, you may want to add
captions to those images in order to describe or explain them. A caption is text linked
specifically to an image which, is separate from the main text of the document. They are often
used to provide extra information and to help the reader correctly identify or interpret the
image.
If you have used a lot of images, or if you are creating a more formal style of document, then
you will also want to number the captioned images so that you can better organize and present
them. Word 2007 provides an easy way to do all of this through the Captions feature.
You can also caption tables, equations, and other items using the same method.
Inserting a caption

35
By default Word 2007 begins a caption with Figure 1 (for
images), Table 1 or Equation 1. You can change this default
text. Select Exclude label from caption if you do not want to
include the label. Select New Label to create a different label
or, select Numbering to change the style from numbers to
letters or roman numerals.
If you are using a style set or template provided by Word
2007, then the Caption style will be automatically applied to
any captions you create.
Procedures
1. Select the item to which you want to add a caption.
2. Select the References tab on the Ribbon.
3. Select the Insert Caption button in the Captions group.
4. Type the desired caption, including any punctuation to appear after
the label.
5. Select .
Inserting a Table of Figures
Discussion
If you have a number of captioned items in your document, you might find it useful to include
a Table of Figures so that readers can easily locate them. Captioned items can include figures
(images), tables, and equations.
The Table of Figures feature provides a list of those items, along with page numbers. In effect
it functions as a table of contents that looks only at a very specific type of content. It relies on
the information already provided through the Captions dialog box.

36
The Table of Figures dialog box
Word provides a complete and formatted Table of Figures.
The dialog box, however, also gives you the opportunity to
fine-tune it. You can adjust the presentation of the page
numbers, or decide not to include them. You can choose
formats based on the document template or other existing
styles such as Classic. You can also decide whether to include
the label and number, or not.
While it is called Table of Figures, this function can also be
used to provide a Table of Tables, a Table of Equations, or a
table of any captioned items.
Procedures
1. Position the insertion point where you want to insert the Table of
Figures.
2. Select the References tab.
37
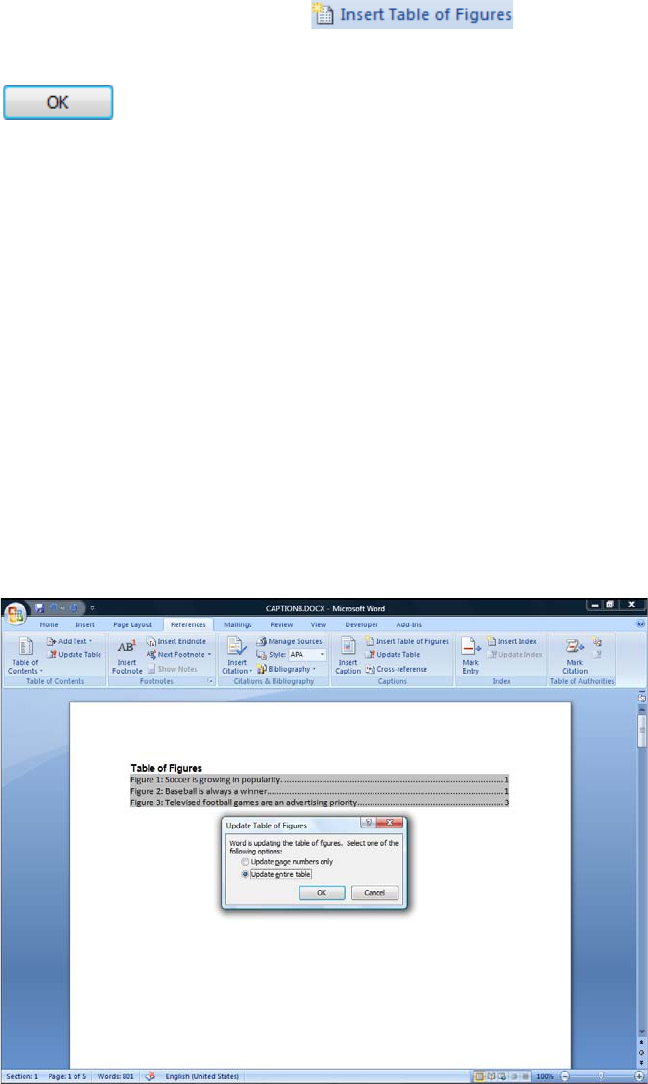
3. Select the Insert Table of Figures button in
the Captions group.
4. Select .
Updating a Table of Figures
Discussion
Once you have inserted a Table of Figures in your document, it provides a list of the captioned
items. The page numbers, caption labels and information drawn from the actual captions are
also included by default. If your document is a dynamic one, however, new captioned items
may be inserted, the existing captions may be edited, and, the page numbering will often
change.
Word 2007 enables you to update a Table of Figures quickly to reflect any changes.
Depending on the situation, you may choose to update either the page numbers only or the
entire table.
The Update Table of Figures dialog box
38
Procedures
1. Position the insertion point anywhere within the Table of Figures to
select it.
2. Select the References tab.
3. Select the Update Table button in the Captions
group.
4. Select the desired option to update the entire table or only the page
numbers.
5. Select .
