studentaffairs.psu.edu/hub/craftcenter
SPRING 2020 Schedule of
CREATE AT HOME - Vol. 2
SERVING PENN STATE STUDENTS, STAFF AND FACULTY
An outreach program of the Penn State Student Activities, Student Engagement Programs
University Park Campus
The Center for
Arts & Crafts
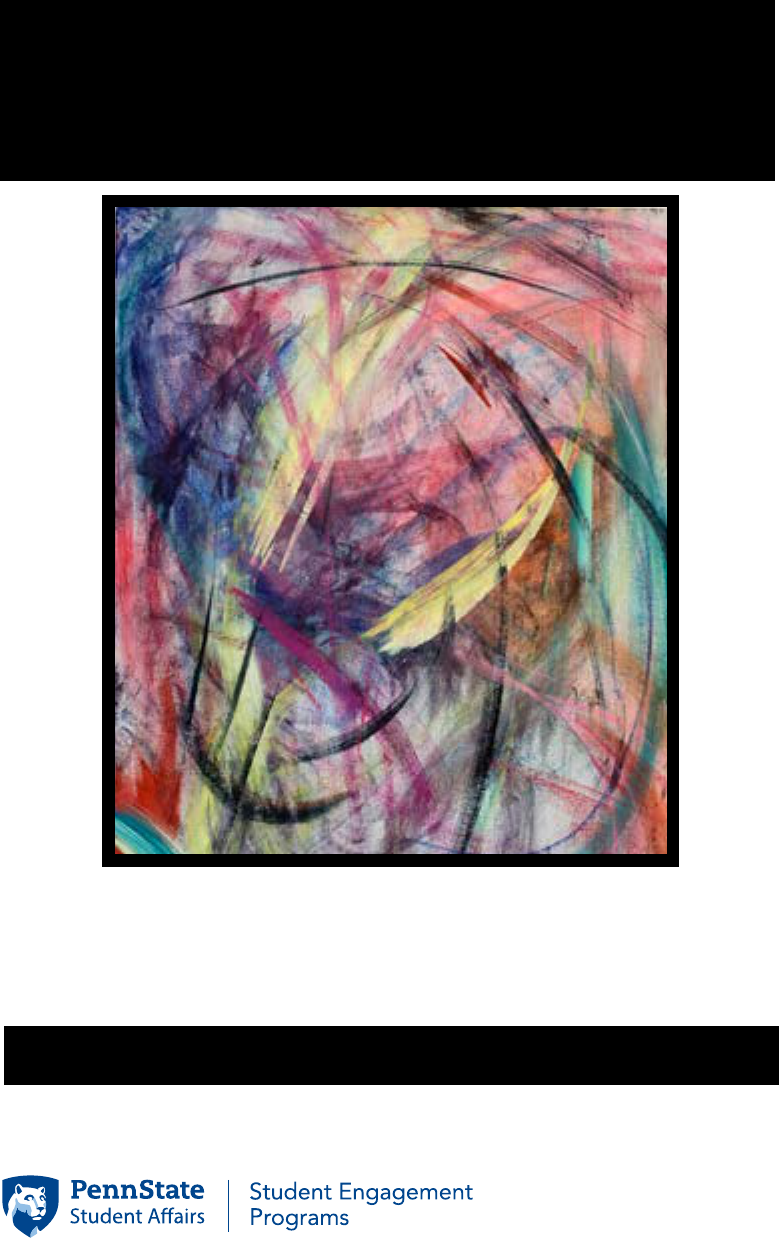
Juice, oil painting by Jesse McCreery
Drawing and Painting BFA and Art Education major at Penn State

CONTENTS
General Info- page 1
History- page 2
Stay Home Workshops- page 3
1
2
Join us on Facebook:
The Center for Arts and Crafts at Penn State
Or Instagram and Twitter:
craftcenterpsu
GENERAL INFO
The Center for Arts and Crafts
Student Activities
Student Aairs
003 Ritenour Building
The Pennsylvania State University
Center Phone: (814) 863-0611
Registration Information: (814) 865-9278
Stephanie Gush, program manager
[email protected], (814) 863-0611
Mandi Gatto, administrative support assistant
[email protected], (814) 863-0611
Cover photo:
Juice, oil painting by Jesse McCreery
Classes are subsidized for Penn State students by your Student Initiated Fee and are oered
at reduced fees to those with a valid and current Penn State Student ID!
Class fees for Penn
State students may vary from semester to semester depending upon allocated funds.
•Classes and workshops are instructed by Penn State art and art education majors and local
professional artists.
•Classes and workshops are non-credit and held in the Ritenour Building or HUB-Robeson
Center. Adult classes are designed for Penn State college aged students and older, as well
as Penn State Faculty and Sta.
•Students may be responsible for purchasing some of their own materials. Some
materials will be provided. Thanks for keeping class fees low!
•The Center for Arts & Crafts (CFAC) program is a Penn State Student Activities program
operated by Penn State students; serving students and the Penn State community seven
days a week!
•Check out Creative Crafts! On Friday nights during the fall and spring semester you can
create a dierent craft each week! The program is held on the ground oor of the HUB-
Robeson Center from 8:00 p.m. to 10:30 p.m. A valid Penn State Student ID is required to
participate.
This publication is available in alternative media on request. Penn State is an equal opportunity, armative action em-
ployer, and is committed to providing employment opportunities to all qualied applicants without regard to race, color,
religion, age, sex, sexual orientation, gender identity, national origin, disability or protected veteran status.
U.Ed.STA 20-384
HISTORY
The Center for Arts and Crafts (CFAC) has a long history of providing an artistic outlet for
Penn State students, sta and faculty. It all began in the 1970s and was located on the third
oor of the Hetzel Union Building (HUB). Approximately 40 years later, the Center for
Arts and Crafts is now located in the lower level of the Ritenour Building and the Ceramics
Studio is located in the lower level of the HUB-Robeson Center.
At the Center for Arts and Crafts, learn new artistic skills or improve current skill levels;
design, create and appreciate arts, crafts and performance arts; and develop creative
thinking, creative expression, and problem solving. The CFAC provides a wide variety of
creative opportunities and oers relaxation and enjoyment through classes, workshops,
community outreach events and exhibits.

Arcimboldo Collage
Step 3: Cut out images of fruits, vegetables,
owers, and objects from a magazine.
Step 4: Arrange the images to ll in the neck
and body. Glue images in place. If you want,
you can paint the background of the face.
Step 5: Arrange the images to create your
eyes, nose, mouth, cheeks and hair.
Glue images in place.
43
Arcimboldo Collage
Giuseppe Arcimboldo (1526–1593)
was an Italian Mannerist painter
born in the northern Italian city of
Milan. He painted compositions of
vegetables, fruits, animals and other
objects and arranged them to
resemble human portraits.
Take a closer look; what do you see?
Be inspired by Arcimboldo as you
create your own portrait! Search for
more of his paintings online.
Materials needed:
• large piece of white paper
• glue stick or glue
• scissors
• magazines to cut up
• pencil
• paint brush
• dark paint (navy or black)
Step 1: Start by drawing an outline of
a head, neck, and shoulders on a large
piece of paper. Sketch lightly where your
eyes, nose, mouth, ears, will be.
Step 2: Paint background with dark paint.
Vertumnus, (1591)
CREATIVITY AT HOME
Join us for volume 2 of Create At Home! Learn about a few famous artists,
styles and various techniques for inspiration to create art at home! Because we
cannot all get together to share in art and creativity in person, here are activities
we designed keeping in mind those art materials you may already have on hand
or items you may be recycling. Go ahead and substitute any supplies based on
what you have. We are excited to see what you create so share your artwork
with us by emailing it to [email protected]. Let us know if you have any
questions.

Matisse Paper Sculpture
Henri Matisse (1869-1954) was a French
artist known for his use of bold color. He
was a painter, sculptor, and printmaker. He
is known for the Fauvism movement which
prioritizes color over realistic values.
In his later years, he moved to paper cut out
collages.
Create a vase sculpture inspired by his paper
cut out art!
Materials needed:
• colored paper (3-4 colors)
• scissors
• pencil
• balloon
• mod podge (or watered down white
glue)
• paint brush
• cup
Step 1: Draw a series of organic leaf
type shapes approximately 6” to 8” long,
and 3” to 4” wide in dierent colors.
Step 2: Cut out shapes. Make 3-4 leaves in each color.
Step 3: Blow up a balloon, put tied end
in the cup to hold it in place and coat
the balloon in mod podge or glue.
Step 4: Layer your cut outs over the
balloon and put a coat of glue or mod
podge over each cut out.
Step 5: Let dry overnight.
Step 6: Pop balloon. You may have to
peel some of the ends of your cut out
up so it does not collapse with the
balloon.
5
6
Picasso Portraits
Pablo Picasso (1881-1973) was a Spanish
artist known for his paintings, sculptures,
and printmaking and for pioneering the
Cubism movement. Cubism focuses on
simplifying more complex gures down
to their geometric forms.
Make a Picasso-inspired project that
you can do with whomever you
happened to be quarantined!
Materials needed:
• Paper
• Crayons/markers/pastels
• Scissors
Step 1: Draw a simple face outline on
a piece of 8.5” x 11” paper.
Step 2: Cut out small rectangles from other
paper. ey can be cut from dierent colors
if desired.
Step 3: Draw a facial feature on each piece:
two eyes, a nose, and mouth. ese can be
abstract or more realistic.
Step 4: Arrange them on your face to create
a fun, abstract portrait.
Try this activity with family/friends, by
having each person make a face, along with
the pieces, then trade them amongst each
other to create the craziest face!
La Gerbe, (1953)
Femme au Beret et
a la Robe Quadrillee, (1937)

7 8
Cardboard Relief Flower Vase
Have leftover cardboard from packages being
sent to your house? Repurpose them to create
some fabulous art work!
Materials needed:
• cardboard pieces- 1 large at roughly
11” x 14” or bigger for background,
plus pieces for vase and ower shapes
• Scissors or box cutter
• Paint
• Paint brushes
• Glue
• Pencil
• Paper for templates
• Hole Punch
• Ribbon or cord for hanging
Step 1: Paint the 11” x 14” background any solid
color. The cardboard will bow slightly as it is
painted but it will atten as it dries. Place a book
on it after it is dry if it still needs to atten more.
It is recommended to mix in a bit of white with
your colors so it can act as a primer.
Step 2: Templates: Fold the paper in half to cut a
symmetrical shape for your vase and owers. Draw
half a vase, roughly 5” tall and cut out while still
folded to use as a template. Cut out ower shapes to
trace for a few raised owers. Use these templates to
trace and cut out the vase and owers on a piece of
scrap cardboard.
Step 3: Paint a base coat on the vase and add
designs as desired. Place your vase on the
background for placement and paint some
owers on the background. The owers can be
very simple shapes. Add in stems and leaves after
owers are painted.
Cardboard Relief Flower Vase
Step 4: Paint your cardboard cut out owers. These
can be at colors or you can mix in a bit of white
to add highlights and dimension. Once petal colors
are dry, paint the center using a series of dots to
give it texture- use orange on the bottom side for
shading.
Step 5: Once dry, glue the vase and cardboard
owers on top of the existing background owers.
Step 6: For textured leaves, cut cardboard into leaf
shapes and peel the top layer of paper o so the
corrugation shows.
Step 7: Punch holes at the top of the background
piece and string ribbon or cord through to hang.

Canvas Tape Painting
Be amazed by what you can make with paint
and tape! This painting creates geometric shapes
and uses negative space!
Materials needed:
• Paints- at least 3 dierent colors
• Paintbrush
• Canvas
• Painters or masking tape
• Cup for water
• Paper Towel
Step 1: Place tape lines on your canvas, going
in all dierent directions (if your tape is wide,
cut it in half, lengthwise for thinner strips).
Step 2: Now that your canvas is divided into
sections, paint each section a dierent color,
making sure to spread your colors out.
Step 3: Let dry for 15-20 minutes.
Step 4: Slowly peel the tape up o the canvas.
Step 5: If any paint got under the tape, you can go
over this with white paint to straighten up lines.
9
